Rebuild RAC clusterware without deleting data

As I have mentioned in my previous posts, I was applying interim patch on database which had post installation script (# <GI_HOME>/crs/install/rootcrs.pl -postpatch) .
The post script failed with permission denied error on ohasd file and left clusterware in a messy situation.

I have opened SR on metalink and one of their support after a huge amount of time of talking and troubleshooting together says:

“We do not know what happened or what steps you have taken to reach this situation. You should open an SR with us before you deconfigure the node.
Please, do bare metal restore as it is recommended by previous engineer.
Bare Metal Restore Procedure for Compute Nodes on an Exadata Environment ( Doc ID 1084360.1 )”

This Bare Metal Restore is like wiping everything and after that I have had to configure RAC, DATAGUARD and everything from scratch. <<–Don’t like such solutions, this is like “if your windows works slowly then reinstall it”.. for windows this might be really true 🙂 nothing than reinstall helps 😀 but on Linux/Oracle you must troubleshoot first.
So I created another SR with another error(Errors at this time were lot) and for the second time I was lucky.
I was working 24/7 with support, the engineers were shifting. Three different engineers worked at different times on this SR.
I want to mention one “Venkata Pradeep Kumar” Oracle support engineer , he is so clever he helped me a lot and we rescued the system !:)

I want to share the steps with you , it should interesting.

Problem:

After applying patch post script on first node (which failed), clusterware on first node was not starting. At this time second node was fine.
I have deconfigured clusterware (write this step in solution section) on first node and it started but with some problems about oc4j service.

2016/09/27 06:56:15 CLSRSC-1003: Failed to start resource OC4J
2016/09/27 06:56:16 CLSRSC-287: FirstNode configuration failed

I have deconfigured clusterware on second node also and tried to run root.sh, but it said that root.sh could not be run because it was not successful on first node. 😦

So, until root.sh script is not completely successful on first node you should not deconfigure it on second. But if you did it do not panic if you have OCR backup.

Solution:

# Deconfigure crs on problematic node , note you may help the different solution , by just configuring one node. In my situation all nodes became problematic.
# Also please be careful, below steps assumes that you have separate group for OCR. Datafiles must be on different group. Or diskgroup will be wiped.

# From root on both nodes node1 , node2

/u01/app/12.1.0.2/grid/crs/install/rootcrs.sh -deconfig -force

# run root.sh on node1 , it may not be completely successful

/u01/app/12.1.0.2/grid/root.sh

# We need to find a good OCR backup , for me it is week.ocr which was taken automatically in 2016/09/15 09:12:28.
# Patch was applied at 10:00AM in 2016/09/25. So we need week.ocr it is before patching.

[root@lbdm01-dr-adm grid]# ocrconfig -showbackup

lbdm02-dr-adm 2016/09/27 02:35:23 /u01/app/12.1.0.2/grid/cdata/lbank-clus-dr/backup00.ocr 3351897854
lbdm02-dr-adm 2016/09/26 15:44:53 /u01/app/12.1.0.2/grid/cdata/lbank-clus-dr/backup01.ocr 3351897854
lbdm02-dr-adm 2016/09/26 11:44:52 /u01/app/12.1.0.2/grid/cdata/lbank-clus-dr/backup02.ocr 3351897854
lbdm02-dr-adm 2016/09/27 02:35:23 /u01/app/12.1.0.2/grid/cdata/lbank-clus-dr/day.ocr 3351897854
lbdm01-dr-adm 2016/09/15 09:12:28 /u01/app/12.1.0.2/grid/cdata/lbank-clus-dr/week.ocr 854493477
lbdm02-dr-adm 2016/09/25 15:29:18 /u01/app/12.1.0.2/grid/cdata/lbank-clus-dr/backup_20160925_152918.ocr 3351897854
lbdm02-dr-adm 2016/09/25 10:34:56 /u01/app/12.1.0.2/grid/cdata/lbank-clus-dr/backup_20160925_103456.ocr 2725022894
lbdm01-dr-adm 2015/07/29 19:46:28 /u01/app/12.1.0.2/grid/cdata/lbank-clus-dr/backup_20150729_194628.ocr 854493477
lbdm01-dr-adm 2015/07/29 19:46:27 /u01/app/12.1.0.2/grid/cdata/lbank-clus-dr/backup_20150729_194627.ocr 854493477

# Ensure that no process left
# node 1

crsctl stop crs -f
ps -ef|grep “/u01/app”

# if here is anything kill them!

#Start clusterware in exclusive mode with no ocr on node 1

crsctl start crs -excl -nocrs

#Restore OCR on node 1

ocrconfig -restore /u01/app/12.1.0.2/grid/cdata/lbank-clus-dr/week.ocr
ocrcheck

# Stop crs on node 1

crsctl stop crs -f
crsctl start crs

# Check the status

crsctl status res -t

# It should be OK

# Do the same steps on node 2 from root, but it may fail

/u01/app/12.1.0.2/grid/root.sh

# Failed

ORA-15160: rolling migration internal fatal error in module SKGXP,valNorm:not-native
. For details refer to “(:CLSN00107:)” in “/u01/app/oracle/diag/crs/lbdm02-dr-adm/crs/trace/ohasd_oraagent_oracle.trc”.
CRS-2883: Resource ‘ora.asm’ failed during Clusterware stack start.
CRS-4406: Oracle High Availability Services synchronous start failed.
CRS-4000: Command Start failed, or completed with errors.
2016/09/28 09:11:00 CLSRSC-117: Failed to start Oracle Clusterware stack

# deconfig on both nodes
# node1 , node2

 /u01/app/12.1.0.2/grid/crs/install/rootcrs.sh -deconfig -force

#and run agin root.sh
# node 1

/u01/app/12.1.0.2/grid/root.sh

# It was completelly successful.

# On second there is still problem

# Read the following document ORA-15160: rolling migration internal fatal error in module SKGXP,valNorm:not-native (NOTE 1682591.1)

# Here problem was on protocols that was used by asm and rdbms.
# rdbms is using rds protocol and asm is using udp, see Oracle Clusterware and RAC Support for RDS Over Infiniband (NOTE 751343.1)
# problem was in libraries and we should relink them with right protocols
# As the ORACLE_HOME/GI_HOME owner, stop all resources (database, listener, ASM etc) that’s running from the home. When stopping database, use NORMAL or IMMEDIATE option.

# From problemtic node , where asm or database is not starting.

crsctl stop crs
ps -ef|grep d.bin
ps -ef|grep “/u01/app”

# Kill if any process left

# If relinking Grid Infrastructure (GI) home, as root, unlock GI home: <GI_HOME>/crs/install/rootcrs.pl -unlock

/u01/app/12.1.0.2/grid/crs/install/rootcrs.sh -unlock

# As the ORACLE_HOME/GI_HOME owner, go to ORACLE_HOME/GI_HOME and cd to rdbms/lib
# As the ORACLE_HOME/GI_HOME owner, issue “make -f ins_rdbms.mk <protocol write here> ioracle”
#For rdbms

[root@lbdm02-dr-adm lib]# su – oracle
[oracle@lbdm02-dr-adm ~]$ cd $ORACLE_HOME/rdbms/lib
make -f ins_rdbms.mk ipc_rds ioracle

#For asm

. oraenv
+ASM2
[oracle@lbdm02-dr-adm ~]$ cd $ORACLE_HOME/rdbms/lib
make -f ins_rdbms.mk ipc_g ioracle

# From root

/u01/app/12.1.0.2/grid/crs/install/rootcrs.sh -patch

# The last step should have configure clusterware also. And everything should be fine. And you can sleep now. 🙂


RAC: root.sh | CRS-2672: Attempting to start ‘ora.storage’ | ORA-01017: invalid username/password

I was configuring clusterware on node1 and got the following error:

…

CRS-2672: Attempting to start ‘ora.storage’ on ‘node1’
ORA-01017: invalid username/password; logon denied
CRS-5017: The resource action “ora.storage start” encountered the following error:
Storage agent start action aborted. For details refer to “(:CLSN00107:)” in “/u01/app/oracle/diag/crs/node1/crs/trace/ohasd_orarootagent_root.trc”.
CRS-2883: Resource ‘ora.storage’ failed during Clusterware stack start.
CRS-4406: Oracle High Availability Services synchronous start failed.
CRS-4000: Command Start failed, or completed with errors.
2016/09/27 05:41:01 CLSRSC-117: Failed to start Oracle Clusterware stack

Died at /u01/app/12.1.0.2/grid/crs/install/crsinstall.pm line 930.
The command ‘/u01/app/12.1.0.2/grid/perl/bin/perl -I/u01/app/12.1.0.2/grid/perl/lib -I/u01/app/12.1.0.2/grid/crs/install /u01/app/12.1.0.2/grid/crs/install/rootcrs.pl ‘ exe ution failed


/u01/app/oracle/diag/crs/node1/crs/trace/ohasd_orarootagent_root.trc file says:

2016-09-27 05:40:56.787330*:kgfn.c@6018: kgfnConnect2Int: sysasm=0 envflags=0x10 srvrflags=0x3 unam=NULL password is NULL pstr=_ocr
2016-09-27 05:40:56.787330*:kgfn.c@6194: kgfnConnect2Int: cstr=(DESCRIPTION=(ADDRESS=(PROTOCOL=beq)(PROGRAM=/u01/app/12.1.0.2/grid/bin/oracle)(ARGV0=oracle+ASM1_ocr)(ENVS=’ORACLE_HOME=/u01/app/12.1.0.2/grid,ORACLE_SID=+ASM1′)(ARGS='(DESCRIPTION=(LOCAL=YES)(ADDRESS=(PROTOCOL=beq)))’)(PRIVS=(USER=root)(GROUP=root)))(enable=setuser))
2016-09-27 05:40:57.273302 : AGENT:2583111424: {0:9:3} {0:9:3} Created alert : (:CRSAGF00113:) : Aborting the command: start for resource: ora.storage 1 1


So why user root???

See, when I connect using root I got ORA-01017

[root@node1 ~]# . oraenv
ORACLE_SID = [+ASM1] ? +ASM1
The Oracle base has been set to /u01/app/oracle
[root@node1 ~]# sqlplus / as sysasm

SQL*Plus: Release 12.1.0.2.0 Production on Tue Sep 27 05:59:01 2016
Copyright (c) 1982, 2014, Oracle. All rights reserved.

ERROR:
ORA-01017: invalid username/password; logon denied

If I connect through Oracle it is OK:

su – oracle

[oracle@node1 ~]$ . oraenv
ORACLE_SID = [LBTCI1] ? +ASM1

[oracle@node1 ~]$ sqlplus / as sysdba

SQL*Plus: Release 12.1.0.2.0 Production on Tue Sep 27 05:59:45 2016
Copyright (c) 1982, 2014, Oracle. All rights reserved.
Connected to:
Oracle Database 12c Enterprise Edition Release 12.1.0.2.0 – 64bit Production
With the Real Application Clusters and Automatic Storage Management options

SQL>


Look the connection string again there is “PROGRAM=/u01/app/12.1.0.2/grid/bin/oracle”, so let’s check file permissions.

[oracle@node1 ~]$ ll /u01/app/12.1.0.2/grid/bin/oracle
-rwsr-s–x 1 root root 295054213 Sep 27 05:26 /u01/app/12.1.0.2/grid/bin/oracle

It must be oracle:oinstall  not root:root 

chown oracle:oinstall /u01/app/12.1.0.2/grid/bin/oracle
chmod 6751 /u01/app/12.1.0.2/grid/bin/oracle


deconfigure(rootcrs.pl -deconfig  -verbose) crs and reconfigure(run root.sh) it again.


error: package cvuqdisk is not installed

I have applied patch on RAC and after running postinstall script on the first node, it failed because of some file permission and the problem started…

I could not startup clusterware on first node.

I have deconfigured clusterware by:

[root@lbdm01-dr-adm ~]# $ORACLE_HOME/crs/install/rootcrs.pl -deconfig -force -verbose

And here I got error(cvuqdisk):

PRCR-1070 : Failed to check if resource ora.net1.network is registered
CRS-0184 : Cannot communicate with the CRS daemon.
PRCR-1070 : Failed to check if resource ora.helper is registered
CRS-0184 : Cannot communicate with the CRS daemon.
PRCR-1070 : Failed to check if resource ora.ons is registered
CRS-0184 : Cannot communicate with the CRS daemon.

CRS-2791: Starting shutdown of Oracle High Availability Services-managed resources on ‘lbdm01-dr-adm’
CRS-2679: Attempting to clean ‘ora.cssd’ on ‘lbdm01-dr-adm’
CRS-2680: Clean of ‘ora.cssd’ on ‘lbdm01-dr-adm’ failed
CRS-2799: Failed to shut down resource ‘ora.cssd’ on ‘lbdm01-dr-adm’
CRS-2795: Shutdown of Oracle High Availability Services-managed resources on ‘lbdm01-dr-adm’ has failed
CRS-4687: Shutdown command has completed with errors.
CRS-4000: Command Stop failed, or completed with errors.
2016/09/26 19:54:12 CLSRSC-463: The deconfiguration or downgrade script could not stop current Oracle Clusterware stack.

2016/09/26 19:54:12 CLSRSC-4006: Removing Oracle Trace File Analyzer (TFA) Collector.

2016/09/26 19:54:26 CLSRSC-4007: Successfully removed Oracle Trace File Analyzer (TFA) Collector.

error: package cvuqdisk is not installed
2016/09/26 19:54:26 CLSRSC-557: Oracle Clusterware stack on this node has been successfully deconfigured. There were some errors which can be ignored.


I have searched information about this package on documentation and I have found the following:

Link: https://docs.oracle.com/database/121/LADBI/pre_install.htm#LADBI7632

Installing the cvuqdisk RPM for Linux

If you do not use an Oracle Preinstallation RPM, then you must install the cvuqdisk RPM. Without cvuqdisk, the Cluster Verification Utility cannot find shared disks, and you receive a “Package cvuqdisk not installed” error when you run the Cluster Verification Utility. Use the cvuqdisk RPM for your hardware (for example, x86_64, or i386).

To install the cvuqdisk RPM, complete the following procedure:

  1. Locate the cvuqdisk RPM package, which is in the directory rpm on the Oracle Database installation media. If you installed Oracle Grid Infrastructure, then it is in the directory oracle_home1/cv/rpm.
  2. Log in as root.
  3. Use the following command to find if you have an existing version of the cvuqdisk package:
  4.  
    # rpm -qi cvuqdisk
    

    If you have an existing version, then enter the following command to deinstall the existing version:

    # rpm -e cvuqdisk
    
  5. Set the environment variable CVUQDISK_GRP to point to the group that owns cvuqdisk, typically oinstall, for example:
    # CVUQDISK_GRP=oinstall; export CVUQDISK_GRP
    
  6. In the directory where you have saved the cvuqdisk RPM, use the following command to install the cvuqdisk package:
    rpm -iv package
    

    For example:

    # rpm -iv cvuqdisk-1.0.9-1.rpm

So I have found the mentioned package in the following directory and installed it.

cd /u01/app/12.1.0.2/grid/cv/rpm

yum install cvuqdisk-1.0.9-1.rpm

Note: The problem is strange but, I am not writing why this happened in this post, because I don’t know it yet 🙂
The aim of this post is that you should know where to find cvuqdisk package and what is it for 🙂

Good Luck!

OCM preparation

Very useful links:

Blog: http://www.dbarj.com.br/en/ocm-11g-preparation/

Youtube:  https://www.youtube.com/watch?v=tRe343WPpG4

I have passed OCM exam :)))) , and the letter is the following:

Dear Mariami,

Congratulations! on the successful completion of the Oracle DBA 11g Certified Master practicum.

You are now a member of an elite group of Oracle professionals.  You will receive your Oracle DBA 11g Certified Master fulfillment kit that includes a congratulations letter, OCM certificate, OCM ID card, and denim OCM shirt to the mailing address mentioned in your Oracle DBA 11g OCM Hands-on course requirement Form.

We request you to please submit your complete postal address in below format and the shirt size through our Fulfillment Kit Request form in Pearson Vue website. Kindly note you have to enter the Authentication code ” to submit your Fulfillment Form. We will process your Oracle DBA 11g OCM success kit once this form is submitted.

  • Address Line1 ( Building No or House number or Apartment No or Room No ) :
  • Address Line2 ( Street name or Street number ) :
  • Address Line3 ( Locality or Area  Name ) :
  • City:
  • State:
  • Zip code / Postal code:
  • Country:
  • Phone No:

Kind regards,
Oracle Certification Program

I dedicate this certificate to my husband Giorgi Beridze!!!!!!!!!!!  He was, is and will be my inspiration 🙂

Virtualbox connect from host to guest via ssh and enable internet on guest

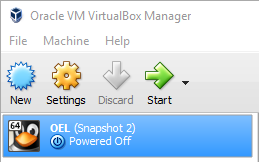
  1. Open Oracle VM Virtualbox Manager

    virtualbox_manager

  2. Place the cursor on the machine that you want to configure and press the button Settings.
    -> Network -> Adapter 1-> check Enable Network Adapter -> in Attached to choose NAT.
    -> in Advanced section -> press Port Forwarding  -> in Port Forwarding Rules, press addition button ->
    Fill the rule , by the following way:
    Host IP: (leave blank)
    Host Port: 22   (or any port that your host has free)
    Guest IP: (leave blank)
    Guest Port: 22

    vm_settings
    rules

  3. Start up the VM and connect to the guest using ssh.
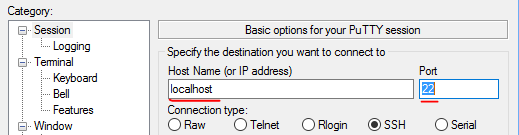
    Hostname: localhost (or your machine name)
    Port: 22 (it is the same that we have indicated during rule configuration field Host Port)

    putty

  4. If you are not using proxy, than you can think that the post finished for you. You can connect to the guest from os and also you have an internet on your guest.

    But if proxy is used then you should configure parameter http_proxy.
    You can enter this variable information in every user’s  ~/.bash_profile or you can do it globally in /etc/profile file.

    #add the following entry in profile file

    [root@oracle01 ~]# vi /etc/profile
    export http_proxy=http://proxyservername.domain.ge:8080

    Logout and login for changes to take effect.

ORA-01184: logfile group 5 already exists

Command:  

ALTER DATABASE ADD LOGFILE THREAD 2 GROUP 11 (‘+DATA’) size 52428800;

Error:

ORA-01184: logfile group 5 already exists

Troubleshoot:

SYS> SELECT thread#, group#
FROM gv$log;

THREAD# GROUP#
———- ———-
1                 1
1                 2
1                 3
1                 4
1                 5
1                 6
1                 7
1                 8
1                 9
1                 10

As we see there are just 10 groups.

Check standby redo logs:

SYS> SELECT group#
FROM v$standby_log;

GROUP#
———-
11

So we have standby redo log with group id 11.

Solution: 

Add logfile group with number more than 11.

I prefer to save numbers for standby logs and add new log with number 22(10 redo log groups+(10+1) recommended number of standby logs+ 1)

SYS> ALTER DATABASE ADD LOGFILE THREAD 2 GROUP 22 (‘+DATA’) SIZE 52428800;

Database altered.

How to find which version of Ralus is installed

Many problems are caused because of version mismatch between server and client backup exec software. Here is the simple steps how to check the version.

###############Linux
  1. From root user run:

    strings  /opt/VRTSralus/bin/beremote | grep -i version

You may already know these commands, but I prefer to explain:

Strings main uses are to determine the contents of and to extract text from binary files. The strings command returns each string of printable characters in files Printable characters are those which actually display on a monitor screen.

Grep prints lines that contain a match for a pattern.
-i option means ignore case. So tells grep to do case insensitive search of “version” keyword.

###############Windows
  1. go to:  ?\Program  Files\Symantec\Backup Exec\beremote.exe
  2. right click and select Properties
  3. view the Details tab


Upgrade 11.2.0.3 to 11.2.0.4 and apply latest PSU 11.2.0.4.160719

Pre-requisites:

  1. Install Oracle Enterprise Linux 6.5
    Recommendations:
    a) After installing OS it is better to install oracle-rdbms-server-11gR2-preinstall-1.0-7.el6.x86_64.rpm from installation cd. It will prepare the environment for future database installation.
    b) Turn off selinux.
    c) Set static ip instead of DHCP.
  2. Install Oracle 11.2.0.3 software and create database named ORCL.

Steps described in this post:

  1. Install Oracle 11.2.0.4 software only.
  2. Upgrade ORCL database using DBUA(located in 11.2.0.4)
  3. Download latest Opatch version for 11.2.
  4. Using Oracle Recommended Patch Advisor download
    Patch 23054359 – Database Patch Set Update 11.2.0.4.160719 (Includes CPUJul2016)  and apply it to newly upgraded database.

Let’s start:

  1. Install Oracle 11.2.0.4 software only using silent installation method:

    a) Download 11.2.0.4 software from here: p13390677_112040_Linux-x86-64_1of7.zip and p13390677_112040_Linux-x86-64_2of7.zip or from metalink.
    b) Make necessary directories to save installation files and unzip files there:

    mkdir /0
    cd /0
    mkdir 11.2.0.4
    cd 11.2.0.4

    Place zip files in /0/11.2.0.4/

    unzip p13390677_112040_Linux-x86-64_1of7.zip
    unzip p13390677_112040_Linux-x86-64_2of7.zip

    c) Prepare the response file located in /0/11.2.0.4/database/response/db_install.rsp

    Just change the following entries:

    #—————————————————————–
    # Specify the installation option.
    # It can be one of the following:
    # – INSTALL_DB_SWONLY
    # – INSTALL_DB_AND_CONFIG
    # – UPGRADE_DB
    #—————————————————————–
    oracle.install.option=INSTALL_DB_SWONLY

    #—————————————————————–
    # Specify the hostname of the system as set during the install. It can be used
    # to force the installation to use an alternative hostname rather than using the
    # first hostname found on the system. (e.g., for systems with multiple hostnames
    # and network interfaces)
    #—————————————————————–
    ORACLE_HOSTNAME=oracle01

    #—————————————————————–
    # Specify the Unix group to be set for the inventory directory.
    #—————————————————————–
    UNIX_GROUP_NAME=oinstall

    #—————————————————————–
    # Specify the location which holds the inventory files.
    # This is an optional parameter if installing on
    # Windows based Operating System.
    #—————————————————————–
    INVENTORY_LOCATION=/u01/app/oraInventory

    SELECTED_LANGUAGES=en

    #—————————————————————–
    # Specify the complete path of the Oracle Home.
    #—————————————————————–
    ORACLE_HOME=/u01/app/oracle/product/11.2.0.4

    #—————————————————————–
    # Specify the complete path of the Oracle Base.
    #—————————————————————–
    ORACLE_BASE=/u01/app/oracle

    # Specify the installation edition of the component.
    # The value should contain only one of these choices.
    # – EE : Enterprise Edition
    # – SE : Standard Edition
    # – SEONE : Standard Edition One
    # – PE : Personal Edition (WINDOWS ONLY)
    #—————————————————————–
    oracle.install.db.InstallEdition=EE

    #—————————————————————–
    # The DBA_GROUP is the OS group which is to be granted OSDBA privileges.
    #—————————————————————–
    oracle.install.db.DBA_GROUP=dba

    #—————————————————————–
    # The OPER_GROUP is the OS group which is to be granted OSOPER privileges.
    # The value to be specified for OSOPER group is optional.
    #—————————————————————–
    oracle.install.db.OPER_GROUP=dba

    #—————————————————————–# Specify the auto-updates option. It can be one of the following:
    # – MYORACLESUPPORT_DOWNLOAD
    # – OFFLINE_UPDATES
    # – SKIP_UPDATES
    #—————————————————————–
    oracle.installer.autoupdates.option=SKIP_UPDATES

    #—————————————————————–
    # Specify whether to enable the user to set the password for
    # My Oracle Support credentials. The value can be either true or false.
    # If left blank it will be assumed to be false.
    #
    # Example : SECURITY_UPDATES_VIA_MYORACLESUPPORT=true
    #—————————————————————–
    SECURITY_UPDATES_VIA_MYORACLESUPPORT=false

    #—————————————————————–
    # Specify whether user doesn’t want to configure Security Updates.
    # The value for this variable should be true if you don’t want to configure
    # Security Updates, false otherwise.
    #
    # The value can be either true or false. If left blank it will be assumed
    # to be false.
    #
    # Example : DECLINE_SECURITY_UPDATES=false
    #—————————————————————–
    DECLINE_SECURITY_UPDATES=true

    d) Switch to oracle user(this user is created when you install oracle-rdbms-server-11gR2-preinstall-1.0-7.el6.x86_64.rpm)

    su – oracle
    cd /0/11.2.0.4/database
    ./runInstaller -silent -responseFile /0/11.2.0.4/database/response/db_install.rsp -showProgress

    Run root scrips as indicated at the end of the installation.

    Note: If you are getting the following error after executing runInstaller:

    [FATAL] [INS-35172] Target database memory (1500MB) exceeds the systems available shared memory ({0}MB).
    CAUSE: The total available shared memory on the system (1496 MB) was less than the chosen target database memory (1500 MB).
    ACTION: Enter a value for target database memory that is less than 1496 MB.

    In parameter file there was described MEMORY_TARGET parameter to 1500MB but /dev/shm size was not big enough. You should increase the size for /dev/shm (the same as tmpfs).

    su –
    vi /etc/fstab

    Add option size=10G accross the line tmpfs.

    tmpfs /dev/shm tmpfs defaults,size=10G 0 0

    Remount tmpfs to make the changes take effect without restarting server.

    mount -o remount tmpfs

    2. Upgrade ORCL database using DBUA(located in 11.2.0.4)

    Note database should be started from old home of course.

    a) Set the environment variables using oraenv

    [oracle@oracle01 ~]$ . oraenv
    ORACLE_SID = [oracle] ? orcl
    The Oracle base has been set to /u01/app/oracle

b) Run dbua from 11.2.0.4 home. Indicate sid of the database to be upgraded and     oracle home of the database to be upgraded  :  /u01/app/oracle/product/11.2.0.3

[oracle@oracle01 bin]$ /u01/app/oracle/product/11.2.0.4/bin/dbua -silent -sid orcl -oracleHome /u01/app/oracle/product/11.2.0.3 -diagnosticDest /u01/app/oracle
Log files for the upgrade operation are located at: /u01/app/oracle/cfgtoollogs/dbua/orcl/upgrade1
Performing Pre Upgrade
1% complete
7% complete
Upgrading Oracle Server
7% complete
8% complete
9% complete
10% complete
10% complete
11% complete
12% complete
12% complete
13% complete
14% complete
15% complete
15% complete
16% complete
17% complete
17% complete
18% complete
19% complete
20% complete
20% complete
21% complete
22% complete
Upgrading JServer JAVA Virtual Machine
23% complete
24% complete
Upgrading Oracle XDK for Java
25% complete
26% complete
Upgrading OLAP Analytic Workspace
27% complete
Upgrading OLAP Catalog
29% complete
Upgrading EM Repository
30% complete
31% complete
32% complete
32% complete
33% complete
34% complete
35% complete
35% complete
36% complete
37% complete
37% complete
38% complete
39% complete
40% complete
40% complete
41% complete
42% complete
42% complete
Upgrading Oracle Text
44% complete
Upgrading Oracle XML Database
45% complete
46% complete
47% complete
47% complete
48% complete
49% complete
50% complete
50% complete
51% complete
52% complete
52% complete
53% complete
54% complete
55% complete
55% complete
56% complete
57% complete
Upgrading Oracle Java Packages
58% complete
Upgrading Oracle interMedia
60% complete
60% complete
Upgrading Spatial
62% complete
62% complete
Upgrading Oracle Workspace Manager
64% complete
Upgrading Expression Filter
65% complete
66% complete
67% complete
67% complete
68% complete
69% complete
70% complete
70% complete
71% complete
72% complete
72% complete
73% complete
74% complete
75% complete
Upgrading Rule Manager
76% complete
Upgrading Oracle Application Express
77% complete
Upgrading Oracle OLAP API
78% complete
Performing Post Upgrade
79% complete
80% complete
85% complete
Configuring Database with Enterprise Manager
86% complete
87% complete
92% complete
Generating Summary
Database upgrade has been completed successfully, and the database is ready to use.
100% complete
Check the log file “/u01/app/oracle/cfgtoollogs/dbua/logs/silent.log” for upgrade details.

c) Check the status of the listener, it should be stopped from the old home and started from new home.

[oracle@oracle01 bin]$ lsnrctl status

Connecting to (ADDRESS=(PROTOCOL=tcp)(HOST=)(PORT=1521))
STATUS of the LISTENER
————————
Alias LISTENER
Version TNSLSNR for Linux: Version 11.2.0.3.0 – Production
Start Date 25-AUG-2016 17:55:13
Uptime 0 days 1 hr. 30 min. 18 sec
Trace Level off
Security ON: Local OS Authentication
SNMP OFF
Listener Parameter File /u01/app/oracle/product/11.2.0.3/network/admin/listener.ora
Listener Log File /u01/app/oracle/diag/tnslsnr/oracle01/listener/alert/log.xml
Listening Endpoints Summary…
(DESCRIPTION=(ADDRESS=(PROTOCOL=ipc)(KEY=EXTPROC1521)))
(DESCRIPTION=(ADDRESS=(PROTOCOL=tcp)(HOST=oracle01)(PORT=1521)))
Services Summary…
Service “orcl” has 1 instance(s).
Instance “orcl”, status READY, has 1 handler(s) for this service…
Service “orclXDB” has 1 instance(s).
Instance “orcl”, status READY, has 1 handler(s) for this service…
The command completed successfully
[oracle@oracle01 bin]$ lsnrctl stop

Connecting to (ADDRESS=(PROTOCOL=tcp)(HOST=)(PORT=1521))
The command completed successfully

[oracle@oracle01 bin]$ cp /u01/app/oracle/product/11.2.0.3/network/admin/listener.ora /u01/app/oracle/product/11.2.0.4/network/admin/listener.ora

[oracle@oracle01 bin]$ cp /u01/app/oracle/product/11.2.0.3/network/admin/tnsnames.ora /u01/app/oracle/product/11.2.0.4/network/admin/tnsnames.ora

##########################Reset oracle environment variables to take new home.

[oracle@oracle01 ~]$ . oraenv
ORACLE_SID = [oracle] ? orcl
The Oracle base has been set to /u01/app/oracle

[oracle@oracle01 bin]$ lsnrctl start

Starting /u01/app/oracle/product/11.2.0.4/bin/tnslsnr: please wait…

TNSLSNR for Linux: Version 11.2.0.4.0 – Production
System parameter file is /u01/app/oracle/product/11.2.0.4/network/admin/listener.ora
Log messages written to /u01/app/oracle/diag/tnslsnr/oracle01/listener/alert/log.xml
Listening on: (DESCRIPTION=(ADDRESS=(PROTOCOL=ipc)(KEY=EXTPROC1521)))
Listening on: (DESCRIPTION=(ADDRESS=(PROTOCOL=tcp)(HOST=oracle01)(PORT=1521)))

Connecting to (DESCRIPTION=(ADDRESS=(PROTOCOL=IPC)(KEY=EXTPROC1521)))
STATUS of the LISTENER
————————
Alias LISTENER
Version TNSLSNR for Linux: Version 11.2.0.4.0 – Production
Start Date 25-AUG-2016 19:27:45
Uptime 0 days 0 hr. 0 min. 0 sec
Trace Level off
Security ON: Local OS Authentication
SNMP OFF
Listener Parameter File /u01/app/oracle/product/11.2.0.4/network/admin/listener.ora
Listener Log File /u01/app/oracle/diag/tnslsnr/oracle01/listener/alert/log.xml
Listening Endpoints Summary…
(DESCRIPTION=(ADDRESS=(PROTOCOL=ipc)(KEY=EXTPROC1521)))
(DESCRIPTION=(ADDRESS=(PROTOCOL=tcp)(HOST=oracle01)(PORT=1521)))
The listener supports no services
The command completed successfully

[oracle@oracle01 bin]$ lsnrctl status


Connecting to (DESCRIPTION=(ADDRESS=(PROTOCOL=IPC)(KEY=EXTPROC1521)))
STATUS of the LISTENER
————————
Alias LISTENER
Version TNSLSNR for Linux: Version 11.2.0.4.0 – Production
Start Date 25-AUG-2016 19:27:45
Uptime 0 days 0 hr. 0 min. 21 sec
Trace Level off
Security ON: Local OS Authentication
SNMP OFF
Listener Parameter File /u01/app/oracle/product/11.2.0.4/network/admin/listener.ora
Listener Log File /u01/app/oracle/diag/tnslsnr/oracle01/listener/alert/log.xml
Listening Endpoints Summary…
(DESCRIPTION=(ADDRESS=(PROTOCOL=ipc)(KEY=EXTPROC1521)))
(DESCRIPTION=(ADDRESS=(PROTOCOL=tcp)(HOST=oracle01)(PORT=1521)))
Services Summary…
Service “orcl” has 1 instance(s).
Instance “orcl”, status READY, has 1 handler(s) for this service…
Service “orclXDB” has 1 instance(s).
Instance “orcl”, status READY, has 1 handler(s) for this service…
The command completed successfully

Note: If you have been using static registration of the database in listener.ora file. Then you must change ORACLE_HOME parameter there to indicate new home.

d) Let’s check that the version was changed:

[oracle@oracle01 bin]$  cat /etc/oratab

# This file is used by ORACLE utilities. It is created by root.sh
# and updated by either Database Configuration Assistant while creating
# a database or ASM Configuration Assistant while creating ASM instance.

# A colon, ‘:’, is used as the field terminator. A new line terminates
# the entry. Lines beginning with a pound sign, ‘#’, are comments.
#
# Entries are of the form:
# $ORACLE_SID:$ORACLE_HOME:<N|Y>:
#
# The first and second fields are the system identifier and home
# directory of the database respectively. The third filed indicates
# to the dbstart utility that the database should , “Y”, or should not,
# “N”, be brought up at system boot time.
#
# Multiple entries with the same $ORACLE_SID are not allowed.
#
#
orcl:/u01/app/oracle/product/11.2.0.4:N


[oracle@oracle01 bin]$ sqlplus / as sysdba

SQL*Plus: Release 11.2.0.4.0 Production on Thu Aug 25 19:29:01 2016

Copyright (c) 1982, 2013, Oracle. All rights reserved.

Connected to:
Oracle Database 11g Enterprise Edition Release 11.2.0.4.0 – 64bit Production
With the Partitioning, OLAP, Data Mining and Real Application Testing options

SQL> select instance_name,version,status from v$instance;

INSTANCE_NAME VERSION STATUS
—————- —————– ————
orcl 11.2.0.4.0 OPEN

SQL> select count(*) from dba_objects where status=’INVALID’;

COUNT(*)
———-
0

exit

3. Download latest Opatch version for 11.2.

On metalink you can find the latest opatch from the following documet.
Patch – Where Can I Find the Latest Version of OPatch(6880880)? [Video] (Doc ID 224346.1)

Choose Release OPatch 11.2.0.0.0
Platform Linux x86-64

Downloaded file name is p6880880_112000_Linux-x86-64.zip

Or you can download from my drive p6880880_112000_Linux-x86-64.zip

Unzip downloaded file and place OPatch folder in 11.2.0.4 home directory. For this you will need to delete or rename existing OPatch folder.

mv /u01/app/oracle/product/11.2.0.4/OPatch /u01/app/oracle/product/11.2.0.4/OPatch_backup

cp -R /0/patch/OPatch  /u01/app/oracle/product/11.2.0.4/OPatch

########## Describe this folder in PATH variable to make your work easy

export PATH=$PATH:/u01/app/oracle/product/11.2.0.4/OPatch

4. Using Oracle Recommended Patch Adviser download
Patch 23054359 – Database Patch Set Update 11.2.0.4.160719 (Includes CPUJul2016)  and apply it to newly upgraded database.

Or download from my drive p23054359_112040_Linux-x86-64.zip

Open readme.html and follow the instuctions.

a) Stop database

[oracle@oracle01 ~]$ sqlplus / as sysdba


SQL> shutdown immediate;
Database closed.
Database dismounted.
ORACLE instance shut down.

b) Stop listener

[oracle@oracle01 ~]$ lsnrctl stop

Connecting to (DESCRIPTION=(ADDRESS=(PROTOCOL=IPC)(KEY=EXTPROC1521)))
The command completed successfully

c) Stop Enterprise manager

[oracle@oracle01 ~]$ emctl stop dbconsole
Oracle Enterprise Manager 11g Database Control Release 11.2.0.4.0
Copyright (c) 1996, 2013 Oracle Corporation. All rights reserved.
https://oracle01:1158/em/console/aboutApplication
Stopping Oracle Enterprise Manager 11g Database Control …
… Stopped.

d) Unzip downloaded file and go to the directory named 23054359

cd /0
mkdir patch
#############Place p23054359_112040_Linux-x86-64.zip here
unzip p23054359_112040_Linux-x86-64.zip
cd 23054359

e) Apply the patch(Note we have already described path /u01/app/oracle/product/11.2.0.4/OPatch in PATH variable, that is why writing just opatch command is enough)

 [oracle@oracle01 23054359]$ opatch apply

Oracle Home : /u01/app/oracle/product/11.2.0.4
Central Inventory : /u01/app/oraInventory
from : /u01/app/oracle/product/11.2.0.4/oraInst.loc
OPatch version : 11.2.0.3.14
OUI version : 11.2.0.4.0
Log file location : /u01/app/oracle/product/11.2.0.4/cfgtoollogs/opatch/opatch2016-08-25_20-13-27PM_1.log

Verifying environment and performing prerequisite checks…
OPatch continues with these patches: 17478514 18031668 18522509 19121551 19769489 20299013 20760982 21352635 21948347 22502456 23054359

Do you want to proceed? [y|n]
y
User Responded with: Y
All checks passed.
Provide your email address to be informed of security issues, install and
initiate Oracle Configuration Manager. Easier for you if you use your My
Oracle Support Email address/User Name.
Visit http://www.oracle.com/support/policies.html for details.
Email address/User Name:

You have not provided an email address for notification of security issues.
Do you wish to remain uninformed of security issues ([Y]es, [N]o) [N]: y

Please shutdown Oracle instances running out of this ORACLE_HOME on the local system.
(Oracle Home = ‘/u01/app/oracle/product/11.2.0.4’)
Is the local system ready for patching? [y|n]
y
User Responded with: Y
Backing up files…

Applying sub-patch ‘17478514’ to OH ‘/u01/app/oracle/product/11.2.0.4’

Patching component oracle.rdbms, 11.2.0.4.0…

Patching component oracle.rdbms.rsf, 11.2.0.4.0…

Patching component oracle.sdo, 11.2.0.4.0…

Patching component oracle.sysman.agent, 10.2.0.4.5…

Patching component oracle.xdk, 11.2.0.4.0…

Patching component oracle.rdbms.dbscripts, 11.2.0.4.0…

Patching component oracle.sdo.locator, 11.2.0.4.0…

Patching component oracle.nlsrtl.rsf, 11.2.0.4.0…

Patching component oracle.xdk.rsf, 11.2.0.4.0…

Patching component oracle.rdbms.rman, 11.2.0.4.0…
Applying sub-patch ‘18031668’ to OH ‘/u01/app/oracle/product/11.2.0.4’

Patching component oracle.rdbms, 11.2.0.4.0…

Patching component oracle.rdbms.rsf, 11.2.0.4.0…

Patching component oracle.ldap.rsf, 11.2.0.4.0…

Patching component oracle.rdbms.crs, 11.2.0.4.0…

Patching component oracle.precomp.common, 11.2.0.4.0…

Patching component oracle.ldap.rsf.ic, 11.2.0.4.0…

Patching component oracle.rdbms.deconfig, 11.2.0.4.0…

Patching component oracle.rdbms.dbscripts, 11.2.0.4.0…

Patching component oracle.rdbms.rman, 11.2.0.4.0…
Applying sub-patch ‘18522509’ to OH ‘/u01/app/oracle/product/11.2.0.4’

Patching component oracle.rdbms.rsf, 11.2.0.4.0…

Patching component oracle.rdbms, 11.2.0.4.0…

Patching component oracle.precomp.common, 11.2.0.4.0…

Patching component oracle.rdbms.rman, 11.2.0.4.0…

Patching component oracle.rdbms.dbscripts, 11.2.0.4.0…

Patching component oracle.rdbms.deconfig, 11.2.0.4.0…
Applying sub-patch ‘19121551’ to OH ‘/u01/app/oracle/product/11.2.0.4’

Patching component oracle.precomp.common, 11.2.0.4.0…

Patching component oracle.sysman.console.db, 11.2.0.4.0…

Patching component oracle.rdbms.rsf, 11.2.0.4.0…

Patching component oracle.rdbms.rman, 11.2.0.4.0…

Patching component oracle.rdbms, 11.2.0.4.0…

…….

Note: In “Email address/User Name:” I have just pressed the enter.

If you have questions please ask.

Thanks to Giorgi Peikrishvili for this case also 🙂


How to fix /lib/ld-linux.so.2: bad ELF interpreter: No such file or directory

During upgrade from 11.2.0.3 to 11.2.0.4 I got  /lib/ld-linux.so.2: bad ELF interpreter: No such file or directory

To solve this problem you should install glibc.i686 packages.

yum install glibc.i686


Thanks to Giorgi Peikrishvili for this case 🙂

Creating a Snapshot-Based Backup of Oracle Linux Database Server(Exadata)

Story: We have Exadata x5-2 servers and they must be PCI compliant. Our PCI scanner found a lot of vulnerabilities on these machines, most of them were rpm upgrades.

So we are in a hell (devil) . Exadata is not a toy and upgrading it’s system is not like playing :):)

We must backup the system , and take the image before doing such things.

Because of Exadata has LVM-s installed we can use LVM based backups.

So let’s start:

Creating a Snapshot-Based Backup of Oracle Linux Database Server with Uncustomized Partitions

This means that you have not changed anything after the initial installation.

a) create mount point where you save backups. It is better if you use NFS. But if you don’t have NFS you may temporarily use local storage and then copy backup to another disk to be more safe.

Exadata local disk is 1.6TB in size and there is about 1.4TB free , so we can create another logical volume for backup. Let’s create logical volume 400GB  in size.
Here, I can tell you the difference between DBA and Sysadmin 🙂 DBA needs more and more space and always takes more than required for being calm for next 5 years. And sysadmin is giving to DBA less space than required and everytime you ask him/her storage his/her face becomes like thinking_80_anim_gif

# lvcreate -L 400GB -n backup VGExaDb
# mkdir /backup
# mkfs.ext4 /dev/VGExaDb/backup
# echo “/dev/VGExaDb/backup     /backup                 ext4    defaults        0 0” >> /etc/fstab
# mount /backup

b) Take a snapshot-based backup of the / (root), /u01. Name them root_snap and u01_snap. Mount them to the newly created directories called exadata_os_backup and exadata_u01_backup.

# mkdir /backup/exadata_os_backup
# mkdir /backup/exadata_u01_backup
# lvcreate -L1G -s -c 32K -n root_snap /dev/VGExaDb/LVDbSys1
Logical volume “root_snap” created.
# e2label /dev/VGExaDb/root_snap DBSYS_SNAP
# mount /dev/VGExaDb/root_snap /backup/exadata_os_backup -t ext4
# lvcreate -L5G -s -c 32K -n u01_snap /dev/VGExaDb/LVDbOra1
Logical volume “u01_snap” created.
# e2label /dev/VGExaDb/u01_snap DBORA_SNAP
# mount /dev/VGExaDb/u01_snap  /backup/exadata_u01_backup -t ext4

c)  Create the backup file using the following command:

# cd  /backup
# tar -pjcvf /backup/os_backup.tar.bz2 * –exclude os_backup.tar.bz2 > /backup/os_backup.stdout 2> /backup/os_backup.stderr

Check the /tmp/backup_tar.stderr file for any significant errors. Errors about failing to tar open sockets, and other similar errors, can be ignored.

d) Unmount the snapshots and remove the snapshots for the root and /01 directories using the following commands:

umount /backup/exadata_u01_backup
umount /backup/exadata_os_backup
lvremove /dev/VGExaDb/u01_snap
lvremove /dev/VGExaDb/root_snap

More information:
https://docs.oracle.com/cd/E50790_01/doc/doc.121/e51951/db_server.htm#DBMMN21380
There is also discussed “Creating a Snapshot-Based Backup of Oracle Linux Database Server with Customized Partitions”.