[WARNING] [INS-08102] Unexpected error occurred while transitioning from state ‘DBIdentification’
July 14, 2023 Leave a comment
Problem:
While using dbca to create a database I get the following error:
[oracle@rac1 ~]$ dbca -silent -createDatabase \
> -responseFile NO_VALUE \
> -templateName New_Database.dbt \
> -dbOptions "OMS:false,JSERVER:false,SPATIAL:false,IMEDIA:false,ORACLE_TEXT:false,SAMPLE_SCHEMA:false,CWMLITE:false,APEX:false,DV:false" \
> -gdbname racdb \
> -characterSet AL32UTF8 \
> -sysPassword Oracle123 \
> -systemPassword Oracle123 \
> -databaseType MULTIPURPOSE \
> -automaticMemoryManagement false \
> -totalMemory 6144 \
> -redoLogFileSize 512 \
> -nodelist rac1,rac2 \
> -storageType ASM \
> -diskGroupName DATA01 \
> -recoveryGroupName DATA01 \
> -recoveryAreaSize 20000 \
> -initParams "log_buffer=128M,processes=3000" \
> -asmsnmpPassword Oracle123
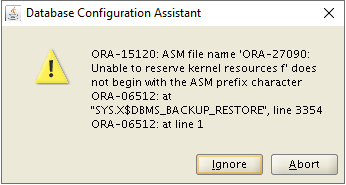
[WARNING] [INS-08102] Unexpected error occurred while transitioning from state 'DBIdentification'
CAUSE: No additional information available.
ACTION: Contact Oracle Support Services or refer to the software manual.On DBCA GUI it looks like this:

Solution:
On the Oracle site or on the Internet, there is no useful information that can help so far. The only place you should search for the reason is in dbca logs generated under /u01/app/oracle/cfgtoollogs/dbca
[root@rac1 dbca]# pwd
/u01/app/oracle/cfgtoollogs/dbca

[root@rac1 dbca]# ll
total 1344
drwxr-xr-x 2 root   root        4096 Jul 14 18:48 old
drwxr-x--- 2 oracle oinstall       6 Apr 28 16:25 orcl
-rw-r----- 1 oracle oinstall 1370046 Jul 14 18:51 trace.log_2023-07-14_06-51-03PM
-rw-r----- 1 oracle oinstall       0 Jul 14 18:51 trace.log_2023-07-14_06-51-03PM.lck
The latest trace file contains the following error messages:
[Thread-355] [ 2023-07-14 18:51:35.375 UTC ] [StreamReader.run:66]  OUTPUT> DIA-49802: missing read, write, or execute permission on specified ADR home directory [/u01/app/grid/diag/crs/rac1/crs/log]
[Thread-355] [ 2023-07-14 18:51:35.375 UTC ] [StreamReader.run:66]  OUTPUT>DIA-49801: actual permissions [rwxr-xr-x], expected minimum permissions [rwxrwx---] for effective user [oracle]
[Thread-355] [ 2023-07-14 18:51:35.375 UTC ] [StreamReader.run:66]  OUTPUT>DIA-48188: user missing read, write, or exec permission on specified directory
....
[Thread-363] [ 2023-07-14 19:01:53.417 UTC ] [StreamReader.run:66]  OUTPUT> DIA-48141: error creating directory during ADR initialization [/u01/app/grid/diag/crs/rac1/crs/trace]
[Thread-363] [ 2023-07-14 19:01:53.417 UTC ] [StreamReader.run:66]  OUTPUT>DIA-48189: OS command to create directory failed
[Thread-363] [ 2023-07-14 19:01:53.417 UTC ] [StreamReader.run:66]  OUTPUT>Linux-x86_64 Error: 1: Operation not permitted
Let’s check permissions on folders under /u01/app/grid/diag/crs/rac1/crs
[root@rac1 dbca]# ll /u01/app/grid/diag/crs/rac1/crs/

drwxr-xr-x 2 grid oinstall   21 Jul 14 16:09 alert
drwxr-xr-x 2 grid oinstall    6 Jul 12 21:33 cdump
drwxr-xr-x 2 grid oinstall    6 Jul 12 21:33 incident
drwxr-xr-x 2 grid oinstall    6 Jul 12 21:33 incpkg
drwxr-xr-x 2 grid oinstall 4096 Jul 12 21:33 lck
drwxrwxr-x 5 grid oinstall   48 Jul 12 21:33 log
drwxr-xr-x 2 grid oinstall 4096 Jul 12 21:33 metadata
drwxr-xr-x 2 grid oinstall    6 Jul 12 21:33 metadata_dgif
drwxr-xr-x 2 grid oinstall    6 Jul 12 21:33 metadata_pv
drwxr-xr-x 2 grid oinstall    6 Jul 12 21:33 stage
drwxr-xr-x 2 grid oinstall    6 Jul 12 21:33 sweep
drwxr-xr-x 2 grid oinstall 8192 Jul 14 18:43 trace
When I have the same case, I always check the same folder on a healthy server, let’s verify permissions on a healthy node:
[root@rac2 oraInventory]# ll /u01/app/grid/diag/crs/rac2/crs

drwxrwxr-x 2 grid oinstall    21 Apr 26 17:53 alert
drwxrwxr-x 5 grid oinstall    57 Jul 13 21:43 cdump
drwxrwxr-x 7 grid oinstall    89 Jul 13 21:43 incident
drwxrwxr-x 2 grid oinstall     6 Apr 26 17:53 incpkg
drwxrwxr-x 2 grid oinstall  4096 Jul 13 21:43 lck
drwxrwxr-x 5 grid oinstall    65 Jun  1 00:36 log
drwxrwxr-x 2 grid oinstall  4096 Apr 26 17:53 metadata
drwxrwxr-x 2 grid oinstall     6 Apr 26 17:53 metadata_dgif
drwxrwxr-x 2 grid oinstall     6 Apr 26 17:53 metadata_pv
drwxrwxr-x 2 grid oinstall   119 Jul 13 21:43 stage
drwxrwxr-x 2 grid oinstall   124 Jul 13 21:43 sweep
drwxrwxr-x 2 grid oinstall 32768 Jul 14 18:43 trace
Now it’s time to correct permissions on the problematic node:
[root@rac1 dbca]# chmod -R 775 /u01/app/grid/diag/crs/rac1/crs/*

[root@rac1 dbca]# ll /u01/app/grid/diag/crs/rac1/crs/

drwxrwxr-x 2 grid oinstall   21 Jul 14 16:09 alert
drwxrwxr-x 2 grid oinstall    6 Jul 12 21:33 cdump
drwxrwxr-x 2 grid oinstall    6 Jul 12 21:33 incident
drwxrwxr-x 2 grid oinstall    6 Jul 12 21:33 incpkg
drwxrwxr-x 2 grid oinstall 4096 Jul 12 21:33 lck
drwxrwxr-x 5 grid oinstall   48 Jul 12 21:33 log
drwxrwxr-x 2 grid oinstall 4096 Jul 12 21:33 metadata
drwxrwxr-x 2 grid oinstall    6 Jul 12 21:33 metadata_dgif
drwxrwxr-x 2 grid oinstall    6 Jul 12 21:33 metadata_pv
drwxrwxr-x 2 grid oinstall    6 Jul 12 21:33 stage
drwxrwxr-x 2 grid oinstall    6 Jul 12 21:33 sweep
drwxrwxr-x 2 grid oinstall 8192 Jul 14 18:43 trace
It is now possible for DBCA to proceed without any issues.
Good Luck!