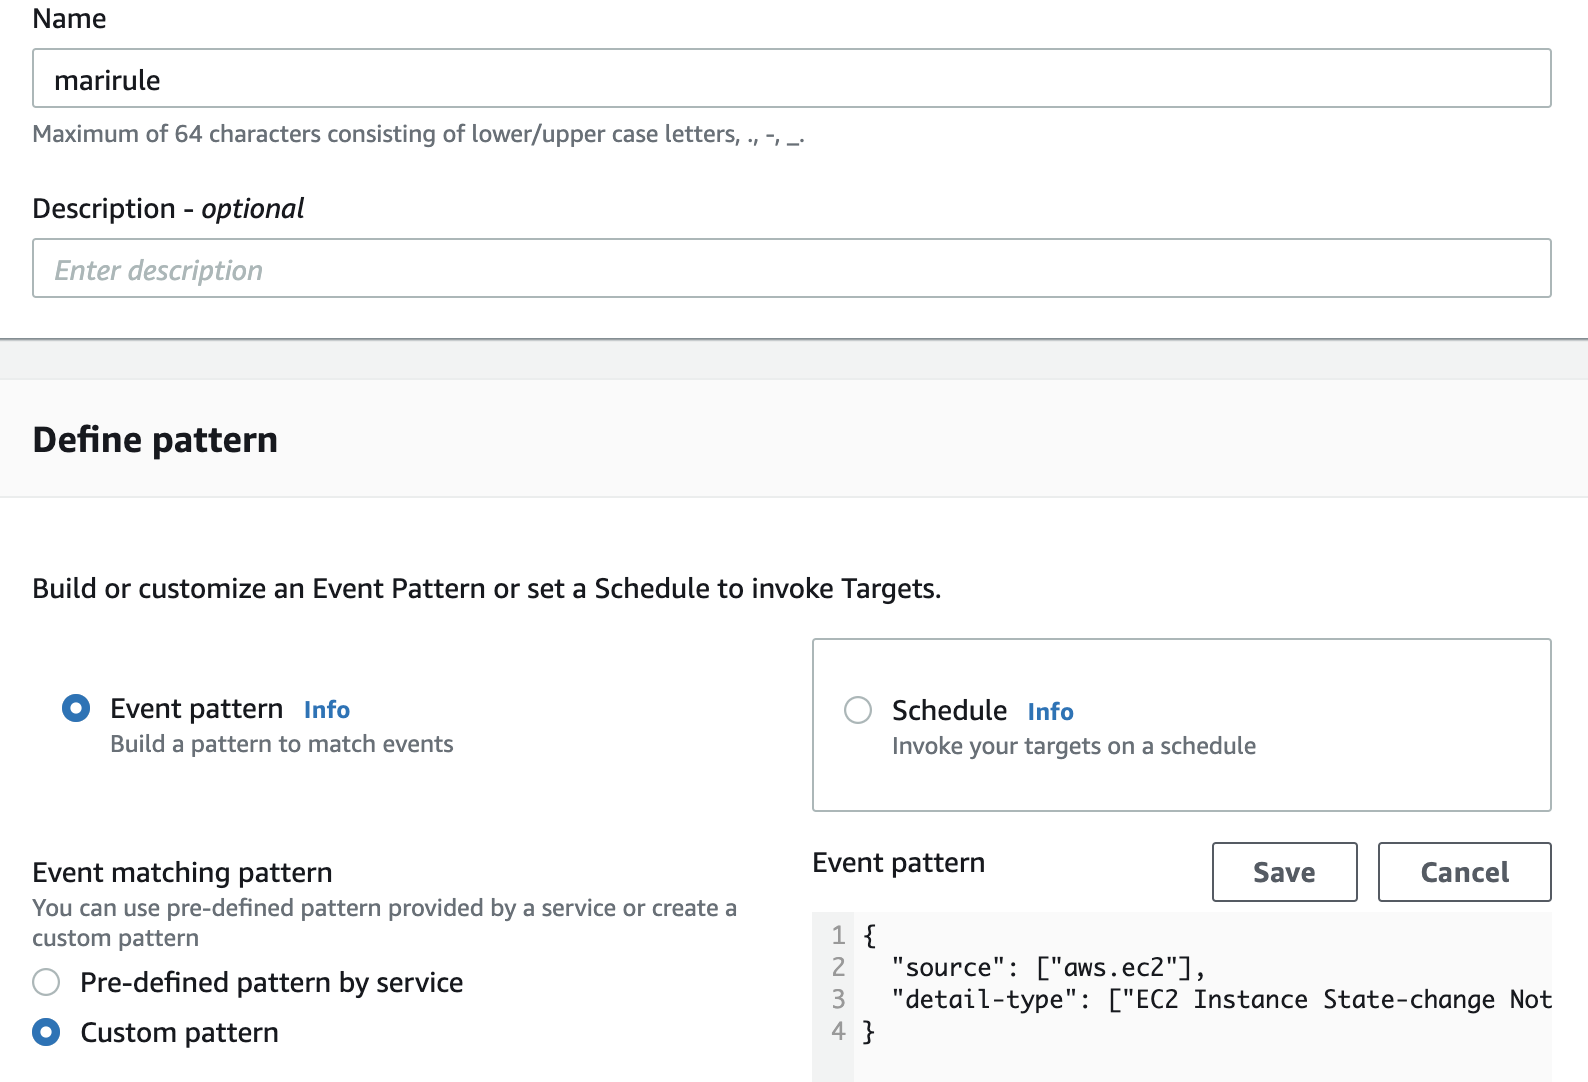
Please note, this pattern can also be generated by choosing “Pre-defined pattern by service” radio button and choosing appropriate services. But for simplicity the above pattern can be entered.
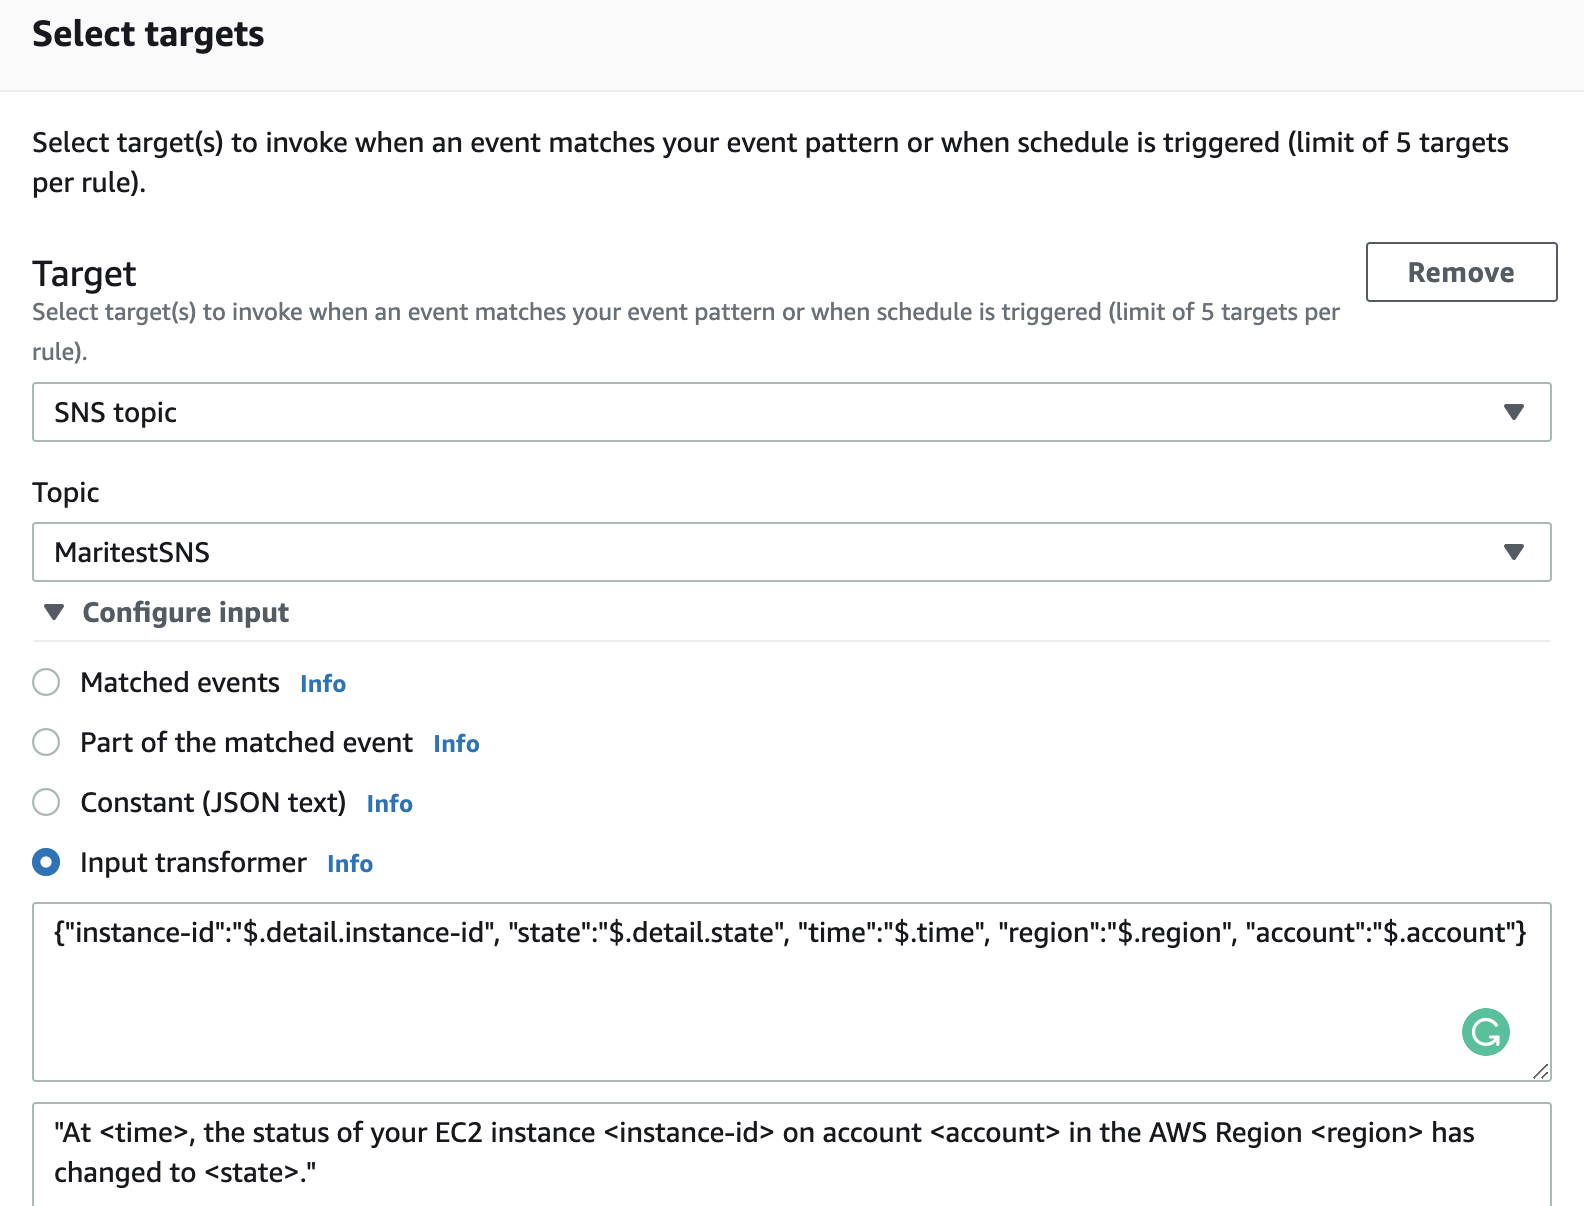
In the Select targets section, choose previously created SNS topic.
Screen 5
In the Input transformer (Screen 5) paste the following strings accordingly:
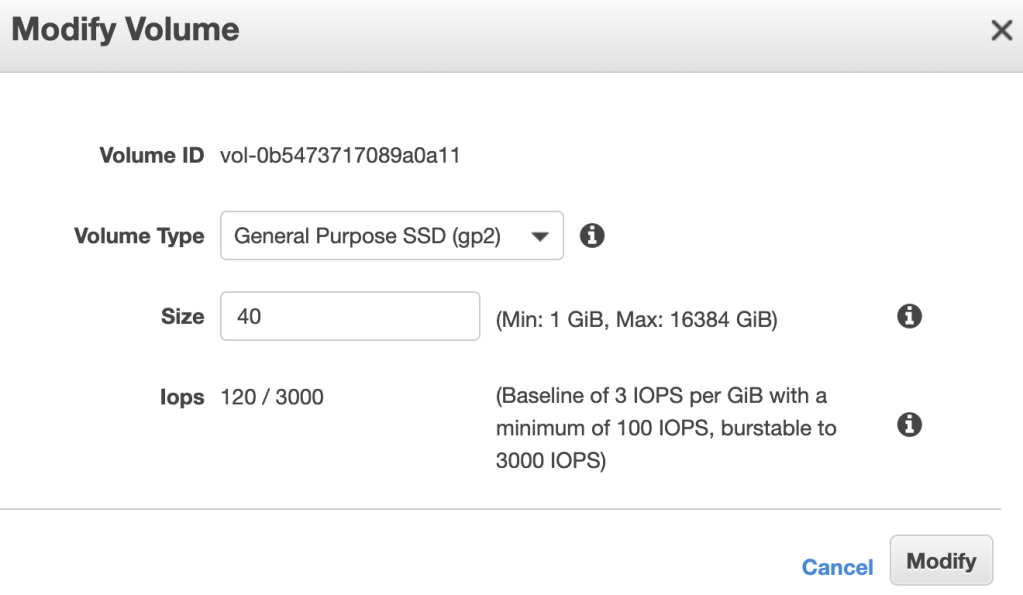
Volumes -> choose disk -> Actions -> Modify Volume -> enter new value in Size field:
2. Use the lsblk command to display information about the block devices attached to your instance:
# lsblk
..
nvme0n1     259:11   0   40G  0 disk
└─nvme0n1p1 259:12   0   35G  0 part /
The root volume, /dev/nvme0n1, has a partition, /dev/nvme0n1p1. While the size of the root volume reflects the new size, 40 GB, the size of the partition reflects the original size, 35 GB, and must be extended before you can extend the file system.
3. To extend the partition on the root volume, use the following growpart command:
On the left side -> under the section ELASTIC BLOCK STORE -> choose Volumes
Choose necessary disk -> click Actions button -> choose Modify Volume -> change Size Please note that all data disks (not quorum disk) must be increased under the same diskgroup, otherwise ASM will not let you to have different sized disks.
Choose another data disks and repeat the same steps.
4. Run the following on database nodes via root user:
# for i in /sys/block/*/device/rescan; do echo 1 > $i; done
5. Check that disks have correct sizes:
# flashgrid-node
6. Connect to the ASM instance from any database node and run:
[grid@rac1 ~]$ sqlplus / as sysasm
SQL*Plus: Release 19.0.0.0.0 - Production on Fri Aug 23 10:17:50 2019
Version 19.4.0.0.0
Copyright (c) 1982, 2019, Oracle.  All rights reserved.
Connected to:
Oracle Database 19c Enterprise Edition Release 19.0.0.0.0 - Production
Version 19.4.0.0.0

SQL> alter diskgroup GRID resize all;
Diskgroup altered.