AWS: Get email when EC2 instance state changes

To setup email notification when your EC2 instances change state, you should configure the following:

  • Amazon SNS topic – where you define recepients
  • Create an EventBridge event – where you define rule on instances that will trigger the notification

1. Create an Amazon Simple Notification Service (Amazon SNS) topic:

Go to Amazon SNS -> Create topic ->
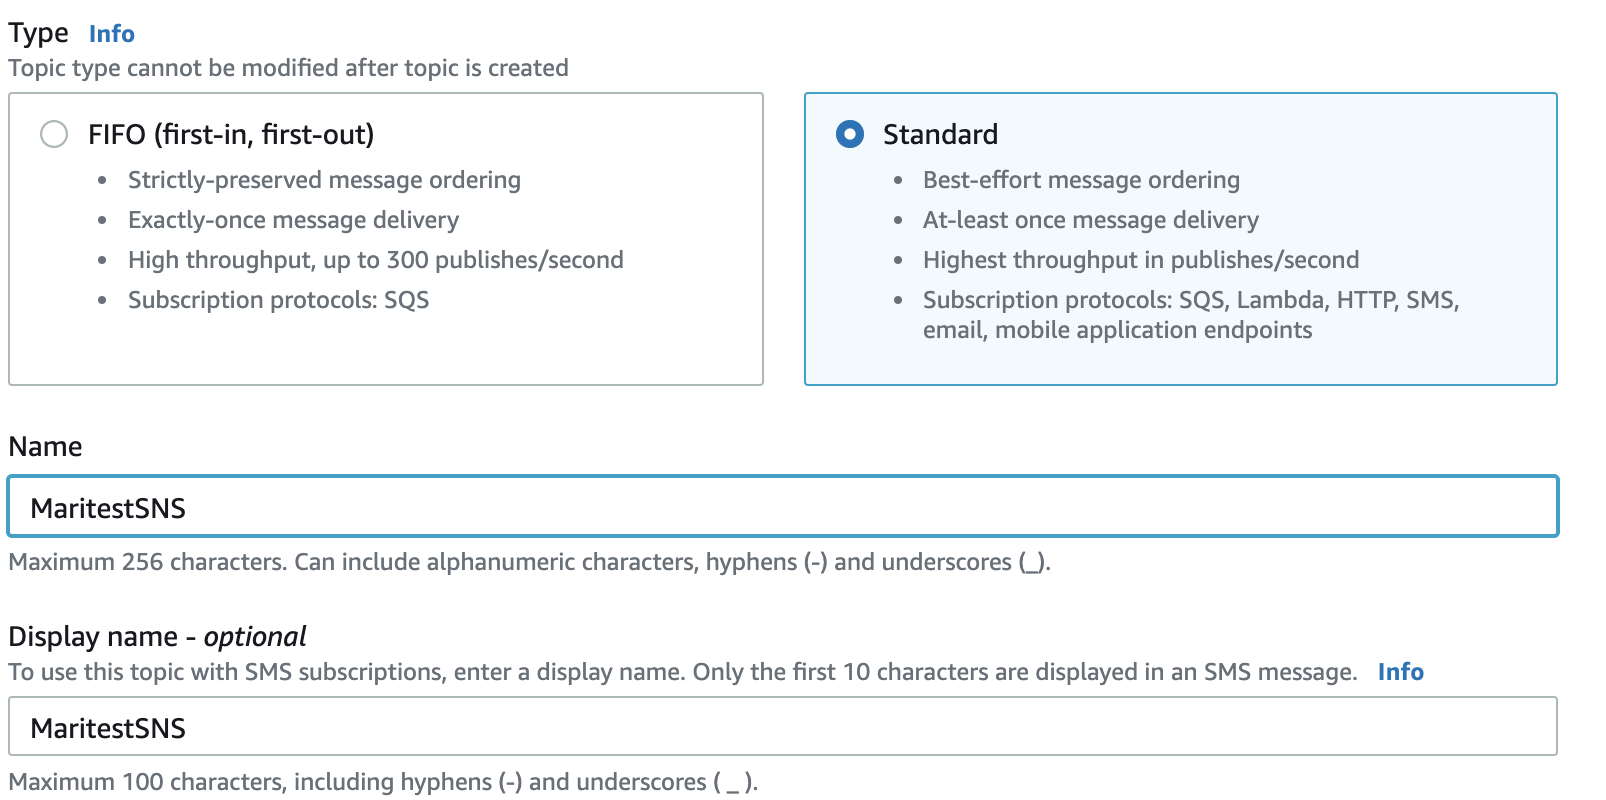
Screen 1

-> Click Create topic

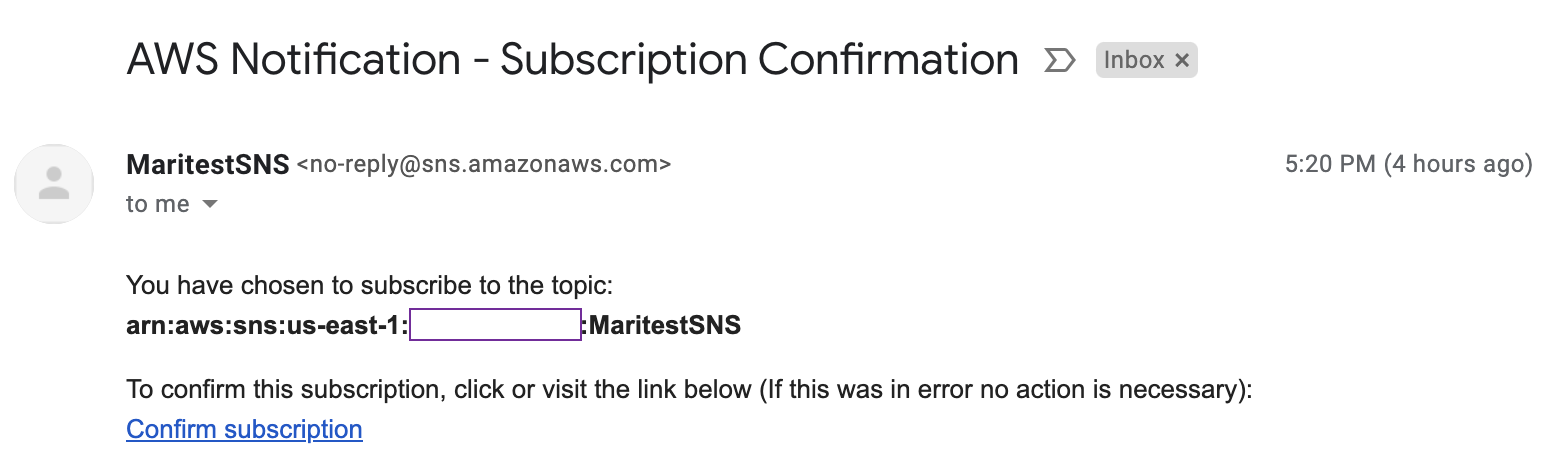
Go to Subscriptions -> Create subscription

Screen 2

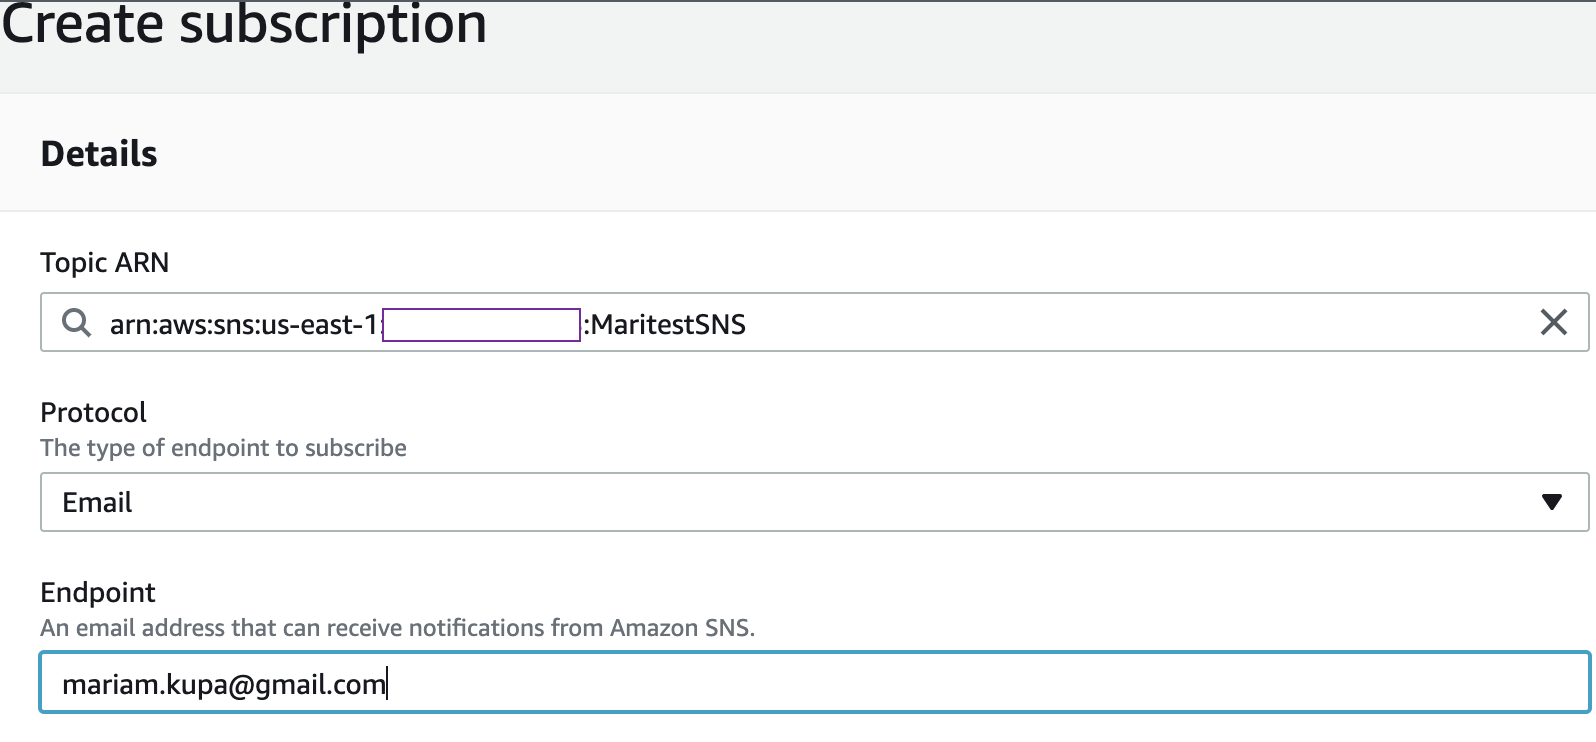
A subscription confirmation email is sent to the address you have entered. Choose Confirm subscription in the email (Screen 3):

Screen 3

2. Create an EventBridge event

Open the EventBridge console -> Create rule

Screen 4

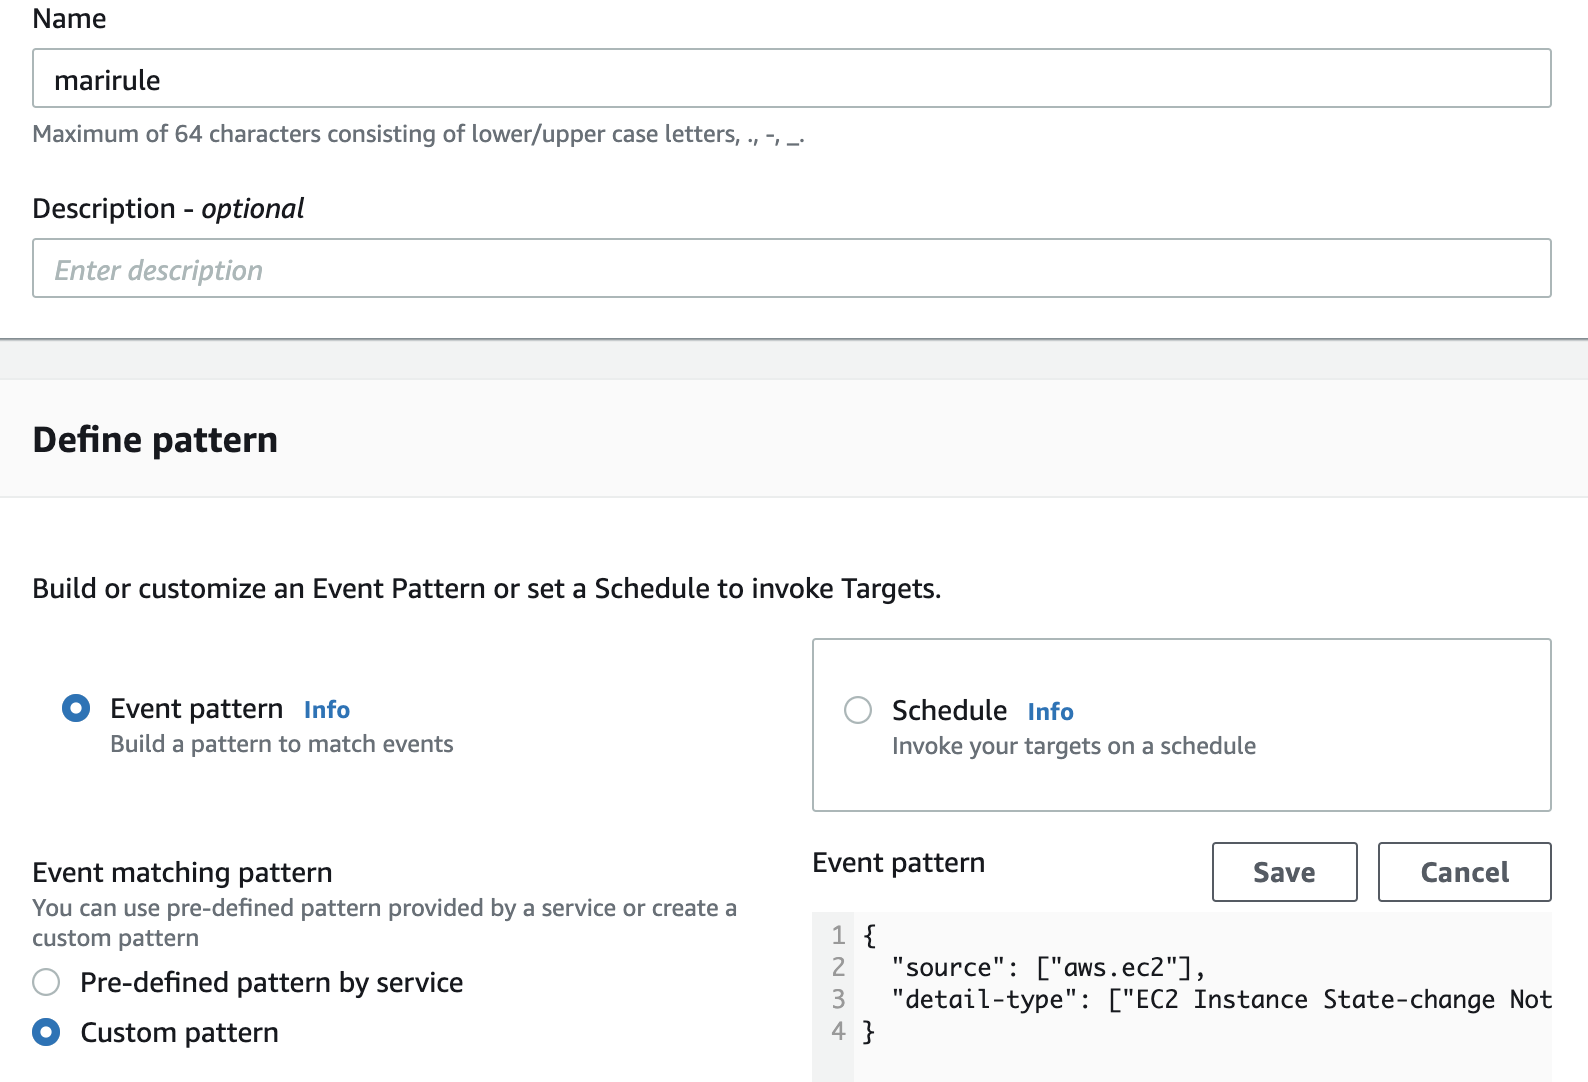
 To monitor all instances, in the Event pattern enter the following (Screen 4)

{
"source": ["aws.ec2"],
"detail-type": ["EC2 Instance State-change Notification"]
}

If you are planing to monitor particular instances then you need to indicate their instance IDs using the following way:

{
"source": ["aws.ec2"],
"detail-type": ["EC2 Instance State-change Notification"],
"detail": {
"instance-id": ["i-0897b9d936bda3bda", "i-0c76e28b0ec1a099c"]
}
}

Please note, this pattern can also be generated by choosing “Pre-defined pattern by service” radio button and choosing appropriate services. But for simplicity the above pattern can be entered.

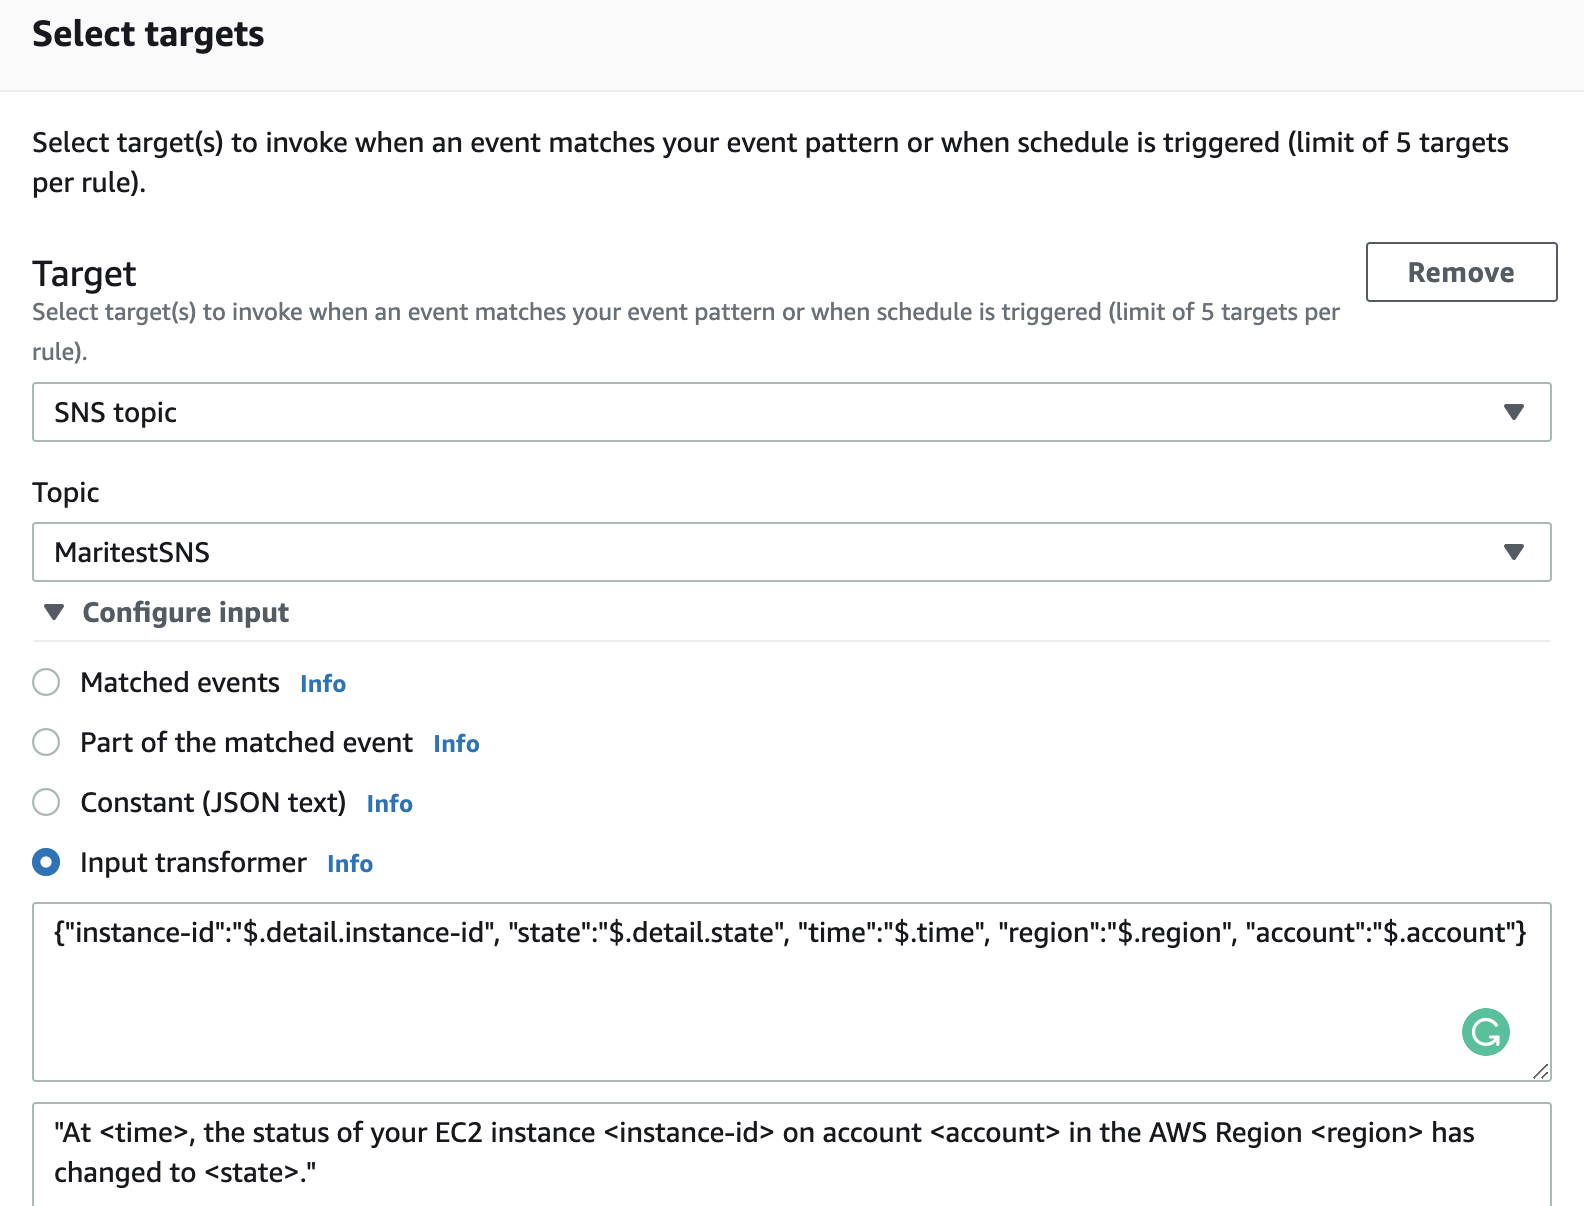
In the Select targets section, choose previously created SNS topic.


Screen 5

In the Input transformer (Screen 5) paste the following strings accordingly:

Input Path

{"instance-id":"$.detail.instance-id", "state":"$.detail.state", "time":"$.time", "region":"$.region", "account":"$.account"}

Input Template

"At <time>, the status of your EC2 instance <instance-id> on account <account> in the AWS Region <region> has changed to <state>."

Click Create.

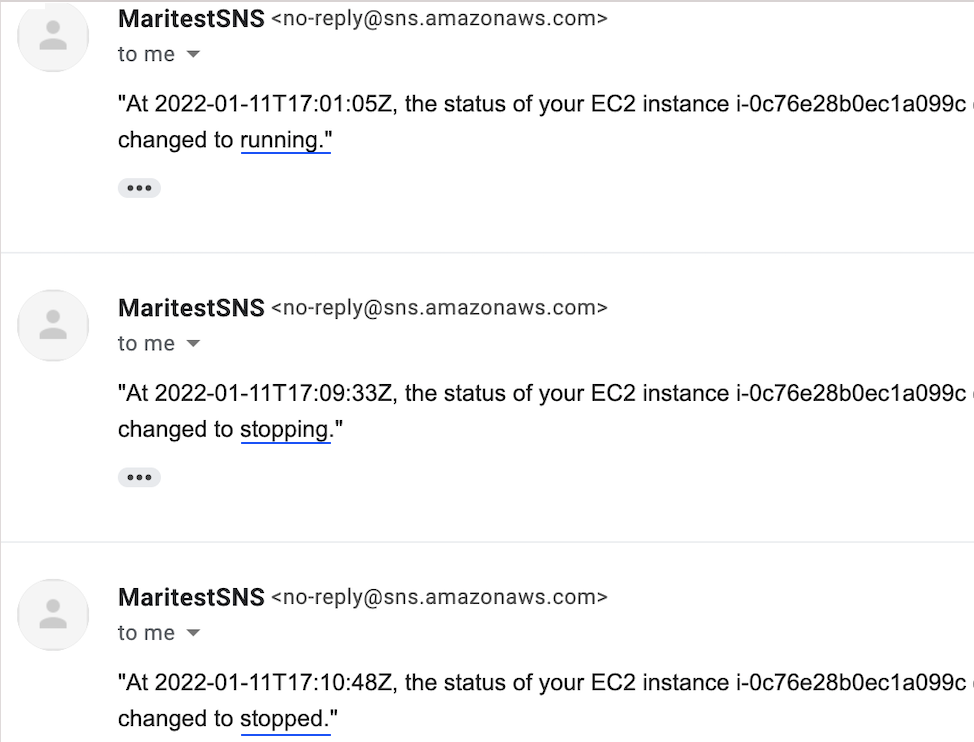
3. Test the configuration

Start/stop target instanes and check your email:

Increase root volume size in AWS

1. Increase disk size from AWS console:

Volumes -> choose disk -> Actions -> Modify Volume -> enter new value in Size field:

2. Use the lsblk command to display information about the block devices attached to your instance:

# lsblk
..
nvme0n1     259:11   0   40G  0 disk
└─nvme0n1p1 259:12   0   35G  0 part /

The root volume, /dev/nvme0n1, has a partition, /dev/nvme0n1p1. While the size of the root volume reflects the new size, 40 GB, the size of the partition reflects the original size, 35 GB, and must be extended before you can extend the file system.

3. To extend the partition on the root volume, use the following growpart command:

# growpart /dev/nvme0n1 1

CHANGED: partition=1 start=2048 old: size=73398239 end=73400287 new: size=83883999 end=83886047

4. Verify new size:

# lsblk
..
nvme0n1     259:11   0   40G  0 disk
└─nvme0n1p1 259:12   0   40G  0 part /

5. Use the df -Th command to verify the size of the file system for root volume:

# df -Th /

Filesystem     Type  Size  Used Avail Use% Mounted on
/dev/nvme0n1p1 xfs    35G  4.2G   31G  12% /

6. From the above output, we see that filesystem is XFS, grow it using xfs_growfs

# xfs_growfs -d /

meta-data=/dev/nvme0n1p1         isize=256    agcount=36, agsize=262080 blks
         =                       sectsz=512   attr=2, projid32bit=1
         =                       crc=0        finobt=0 spinodes=0 rmapbt=0
         =                       reflink=0
data     =                       bsize=4096   blocks=9174779, imaxpct=25
         =                       sunit=0      swidth=0 blks
naming   =version 2              bsize=4096   ascii-ci=0 ftype=1
log      =internal               bsize=4096   blocks=2560, version=2
         =                       sectsz=512   sunit=0 blks, lazy-count=1
realtime =none                   extsz=4096   blocks=0, rtextents=0
data blocks changed from 9174779 to 10485499

If filesystem is ext2, ext3, or ext4, you should use resize2fs.

7. Check new size:

# df -Th /

Filesystem     Type  Size  Used Avail Use% Mounted on
/dev/nvme0n1p1 xfs    40G  4.2G   36G  11% /

Resize ASM disks in AWS (FG enabled cluster)

  1. Connect to AWS console https://console.aws.amazon.com
  2. On the left side -> under the section ELASTIC BLOCK STORE -> choose Volumes
  3. Choose necessary disk -> click Actions button -> choose Modify Volume -> change Size
    Please note that all data disks (not quorum disk) must be increased under the same diskgroup, otherwise ASM will not let you to have different sized disks.

Choose another data disks and repeat the same steps.

4. Run the following on database nodes via root user:

# for i in /sys/block/*/device/rescan; do echo 1 > $i; done

5. Check that disks have correct sizes:

# flashgrid-node

6. Connect to the ASM instance from any database node and run:

[grid@rac1 ~]$ sqlplus / as sysasm
SQL*Plus: Release 19.0.0.0.0 - Production on Fri Aug 23 10:17:50 2019
Version 19.4.0.0.0
Copyright (c) 1982, 2019, Oracle.  All rights reserved.
Connected to:
Oracle Database 19c Enterprise Edition Release 19.0.0.0.0 - Production
Version 19.4.0.0.0

SQL> alter diskgroup GRID resize all; 
Diskgroup altered.