A fault domain is a logical grouping of hardware within a data center that shares a common power source and network switch.
In cloud environments like Microsoft Azure or Oracle Cloud, fault domains help improve high availability by ensuring that resources (like virtual machines) are distributed across isolated hardware. This way, if a failure occurs in one fault domain (e.g., a power outage or hardware failure), it doesn’t affect the other domains.
In clustered environments such as Oracle RAC and others, it is highly recommended to distribute database nodes across different Availability Zones (preferably within close proximity). However, if the selected region does not support Availability Zones, or if the network latency between AZs is too high, you can instead distribute the nodes across different fault domains to ensure fault tolerance at the power and network switch level.
To verify how many fault domains are supported in your chosen region, run the following script from Azure CLI:
az vm list-skus --resource-type availabilitySets --query '[?name==`Aligned`].{Location:locationInfo[0].location, MaximumFaultDomainCount:capabilities[0].value}' -o Table
The output by June 11, 2025, is as follows (subject to change in the future):
Use Azure CLI to retrieve available VM SKUs (sizes) in a specified region, filter them by a VM type, and formats the output.
In this specific case, I am checking whether the E20as_v6 and E20s_v6 sizes are available in the eastus2 region and determining the zones in which they are offered:
mari@Azure:~$ az vm list-skus --location eastus2 --all true --resource-type virtualMachines --output table | grep -E "E20as_v6|E20s_v6"
Specifies the Azure region (eastus2) where the VM SKUs should be retrieved.
--all true
Show all information including vm sizes not available under the current subscription.
--resource-type virtualMachines
Filters the SKU list specifically for virtual machines.
--output table
Formats the output into a readable table format instead of JSON.
| grep -E "E20as_v6|E20s_v6"
Pipes (|) the output into grep, filtering only the lines containing E20as_v6 or E20s_v6.
Explanation of the result:
Value
Description
None
This column usually shows restrictions, such as NotAvailableForSubscription. Here, “None” means no restrictions apply, and the VM SKU can be deployed without limitations.
1, 2
VMs are available in 1 and 2 availability zones
E-Series VMs are optimized for memory-intensive workloads such as in-memory databases, and big data applications.
To enable AD authentication on a Linux OS Azure VM, you must install Azure CLI and have the SSH extension. However, the SSH extension is not installed automatically after installing Azure CLI.
I can guide you through the simple steps to add this extension.
Solution:
Ensure that the extension is not present:
~ az version
{
  "azure-cli": "2.49.0",
  "azure-cli-core": "2.49.0",
  "azure-cli-telemetry": "1.0.8",
  "extensions": {}
}
List available extensions:
~ az extension list-available --output table

Name    Version    Summary  Preview  Experimental  Installed
------- --------   -------  -------  ------------  --------------------------
...
ssh     1.1.6      SSH...   False    False         False
...
Add extension:
~ az extension add --name ssh
Ensure that the extension has been added:
~ az version
{
  "azure-cli": "2.49.0",
  "azure-cli-core": "2.49.0",
  "azure-cli-telemetry": "1.0.8",
  "extensions": {
    "ssh": "1.1.6"
  }
}
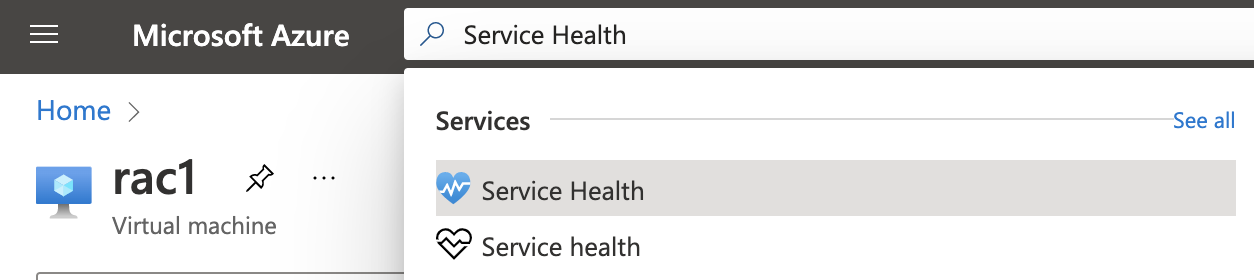
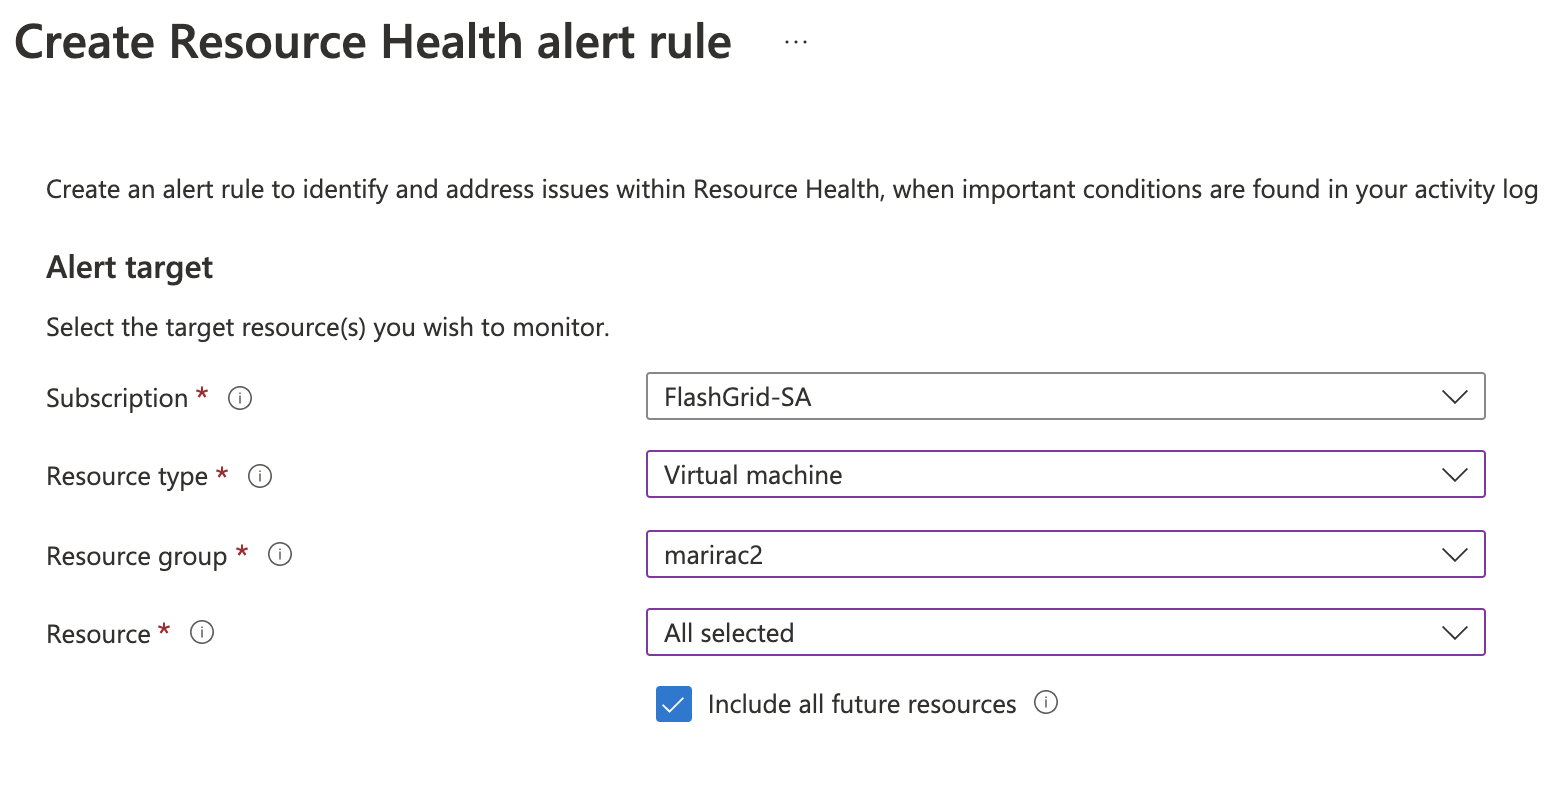
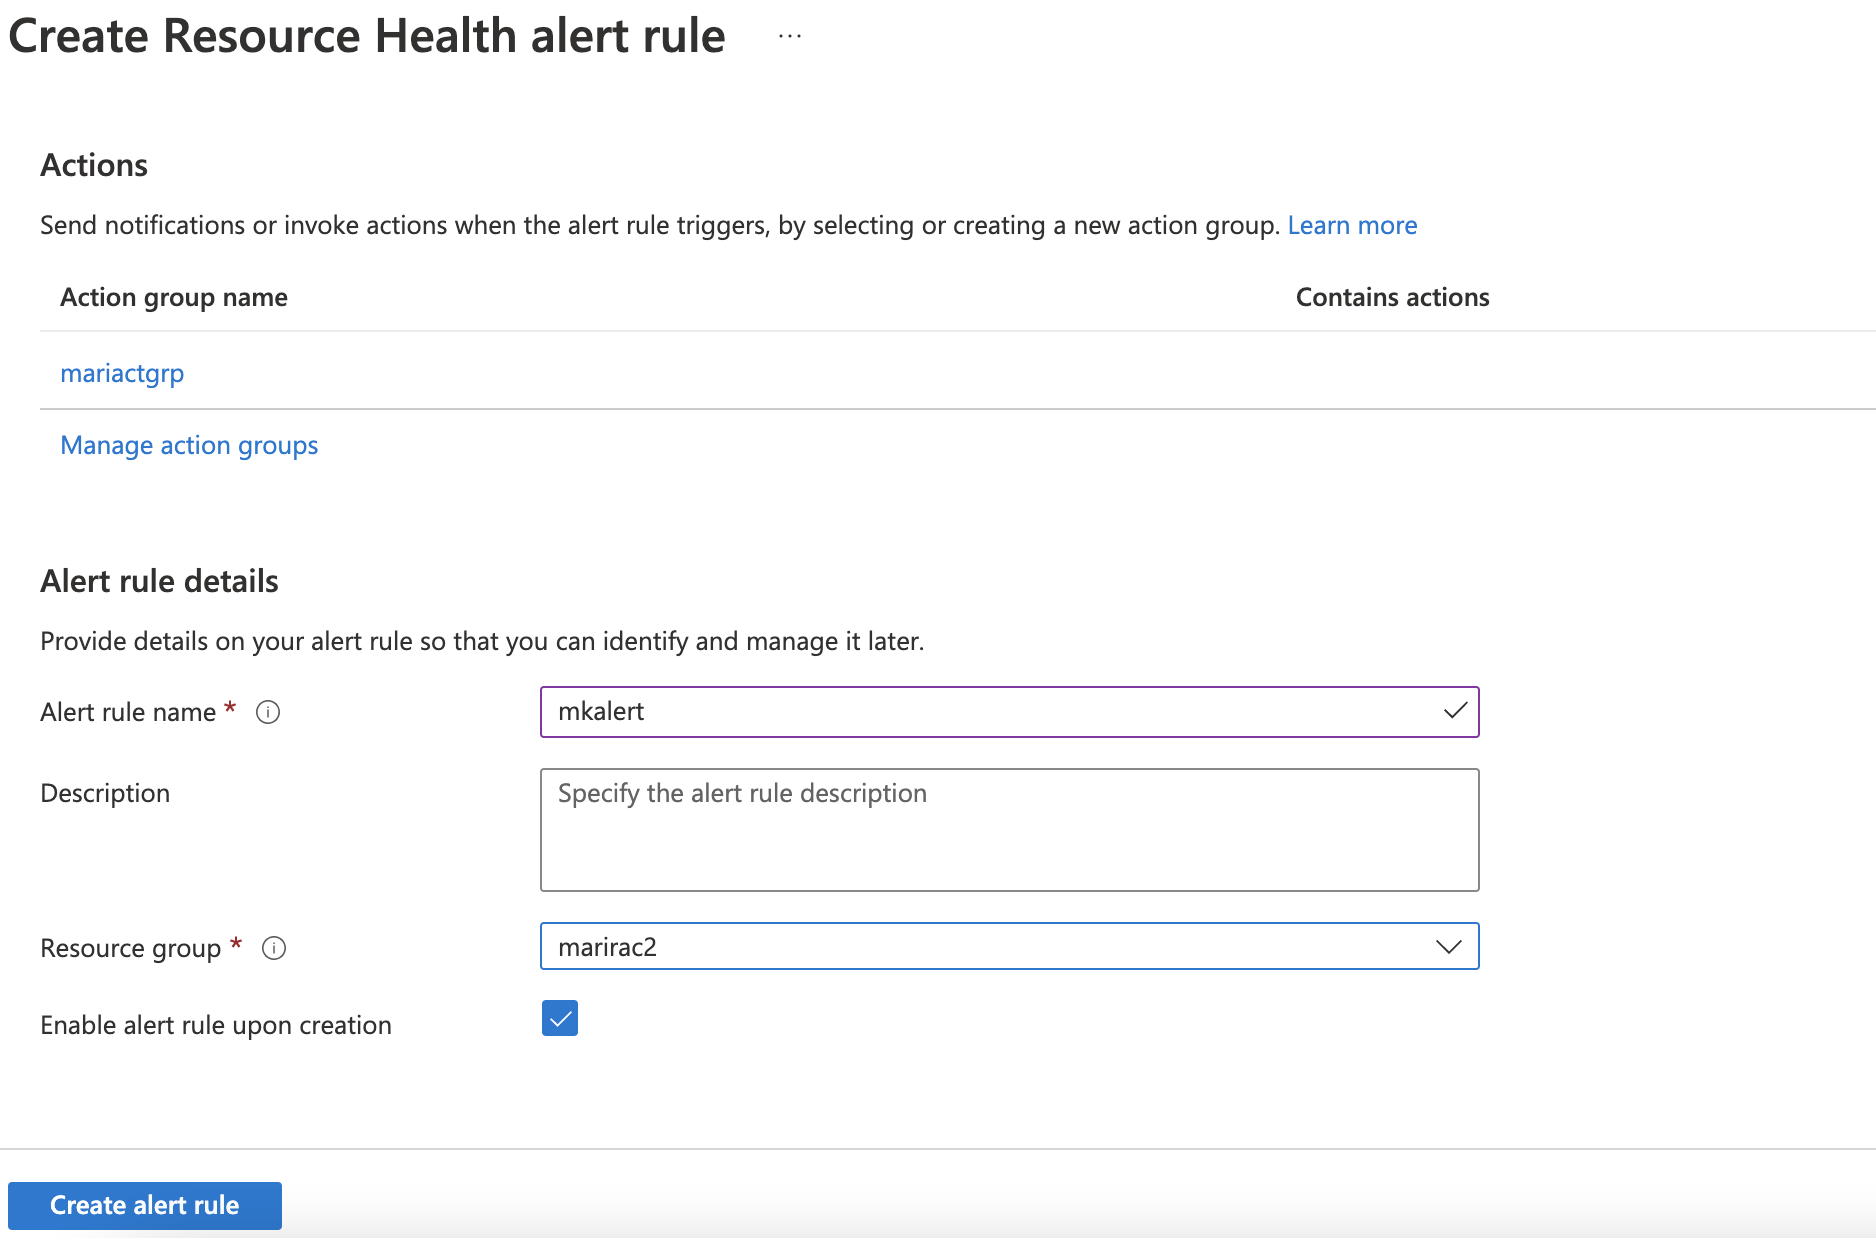
2. From the left side panel choose Resource health -> click Create Resource Health alert rule
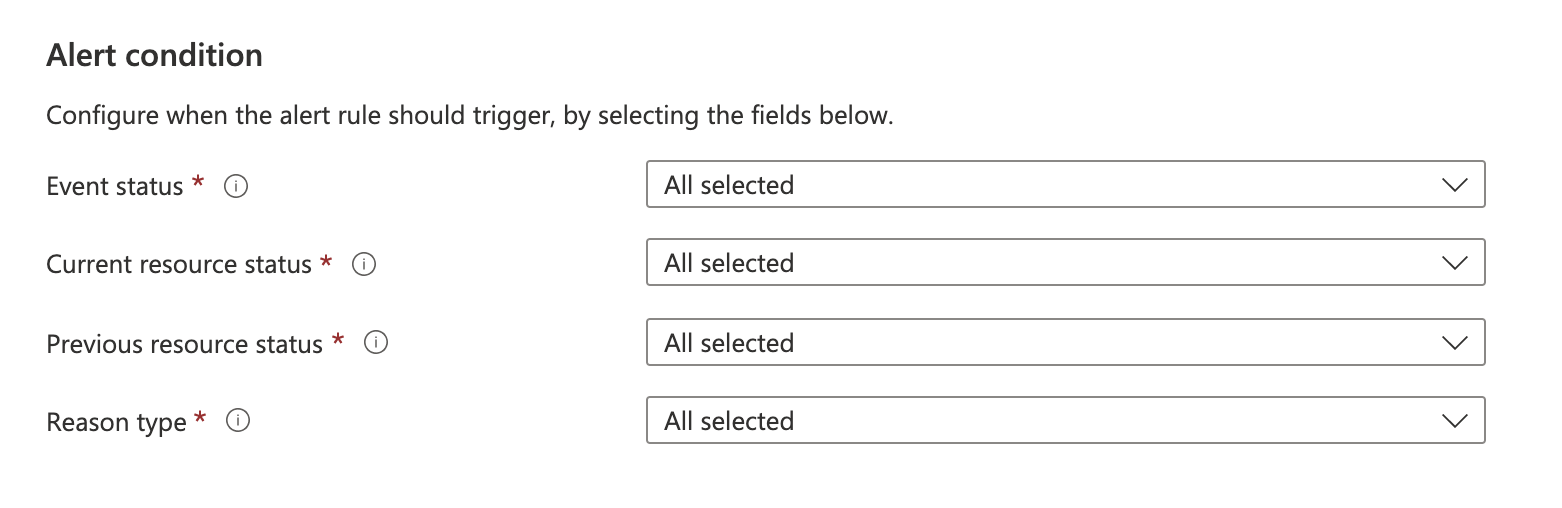
Fill in the necessary fields:
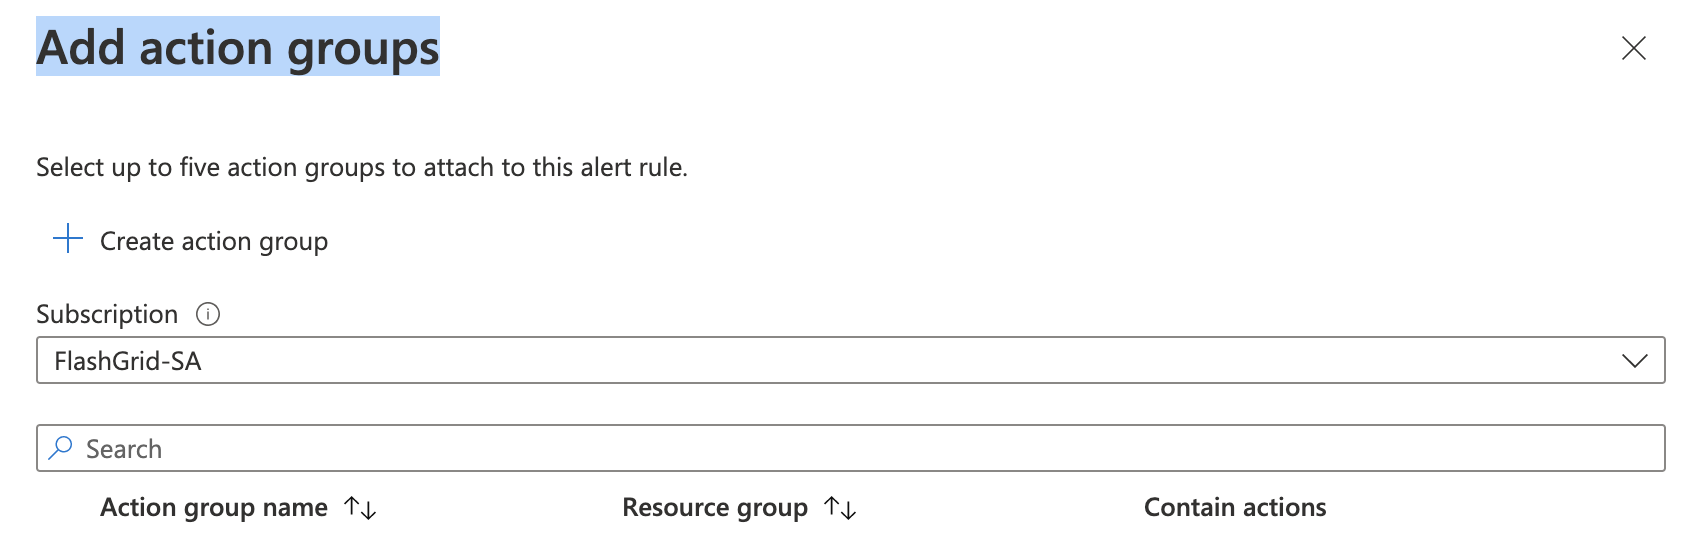
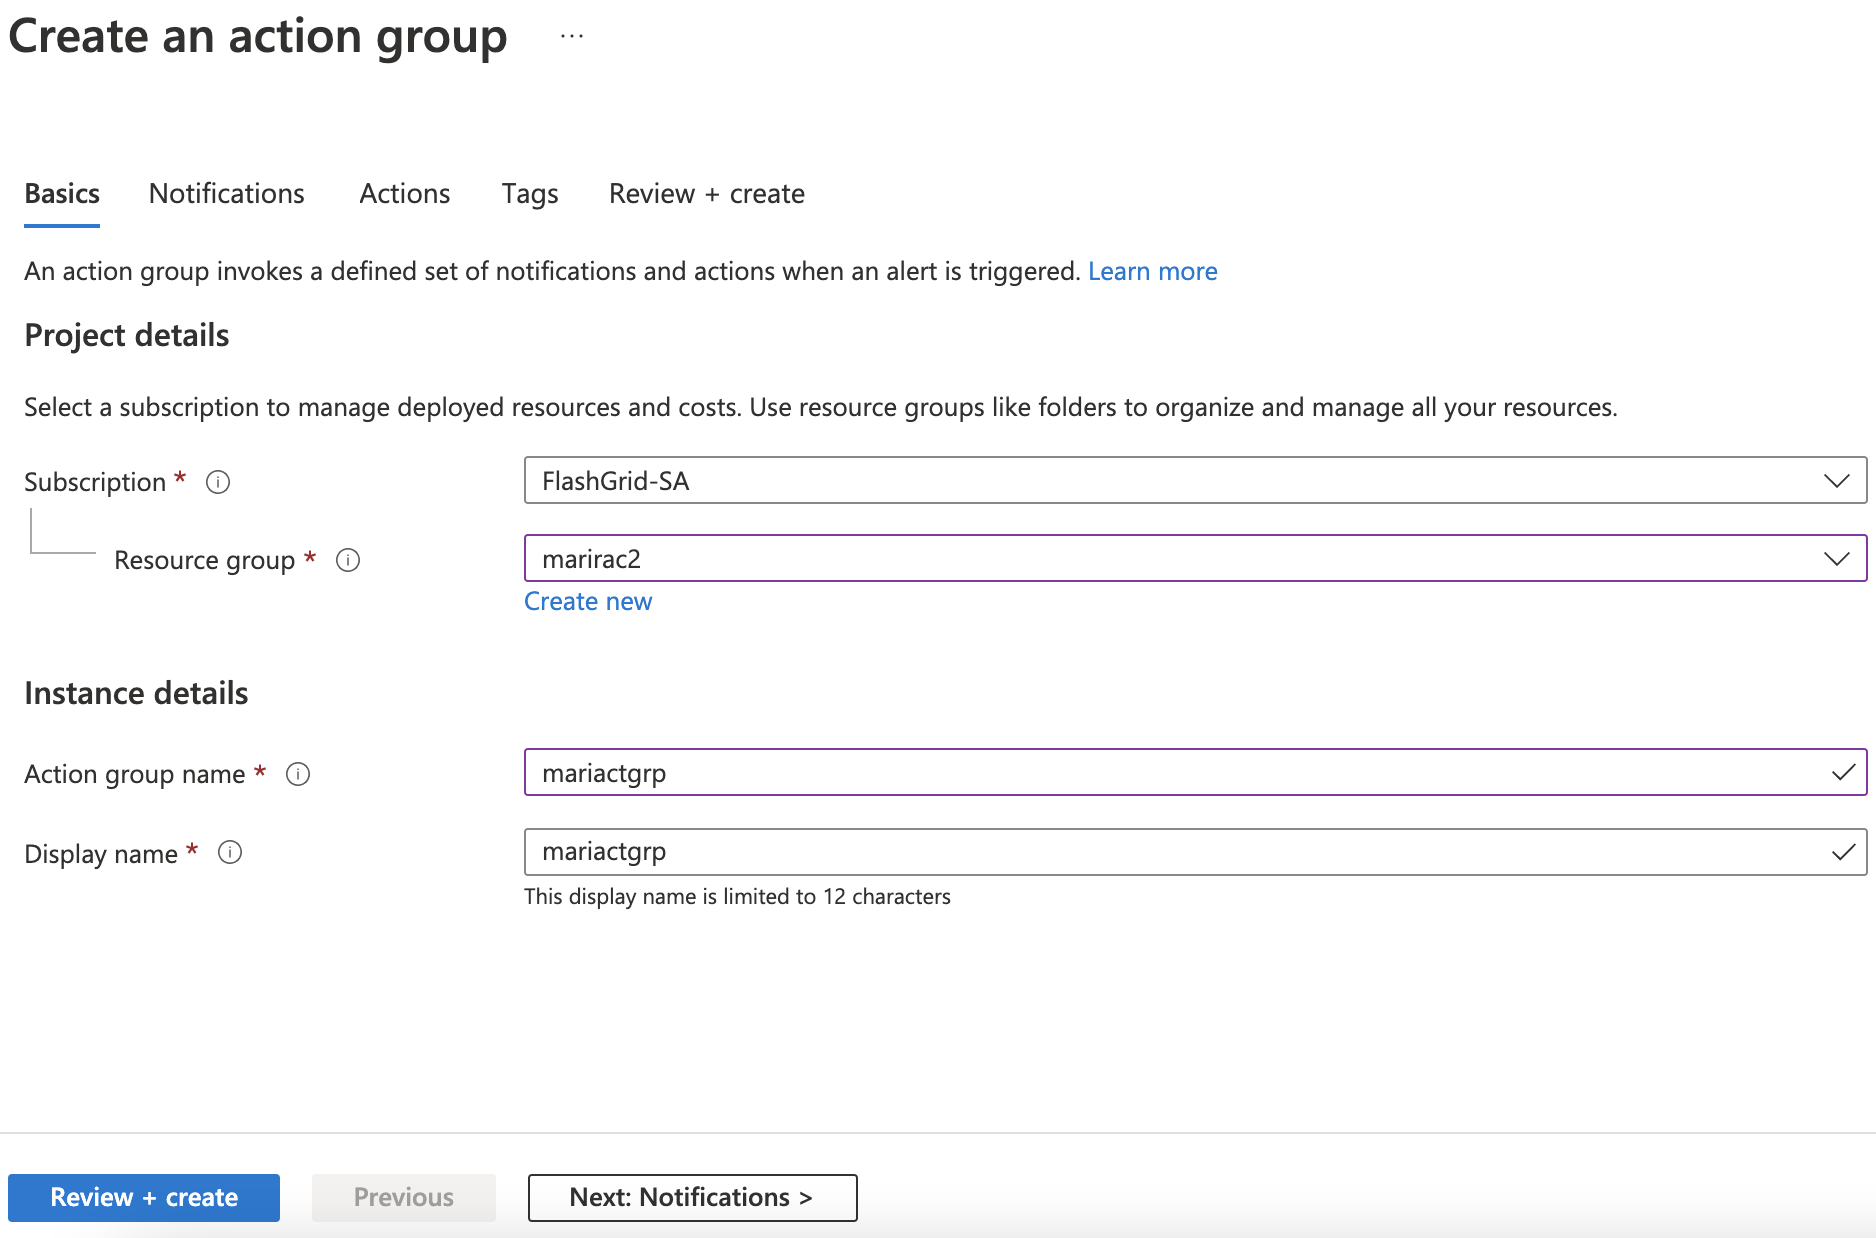
In the Actions section, you have to indicate action groups. As long as we have not created any before, let’s click Add action groups -> Create action group
And fill in the following fields:
Click Review + create -> Create.
After creating the group you will see that the new group was chosen automatically. Fill in fields under Alert rule details:
Click Createalert rule.
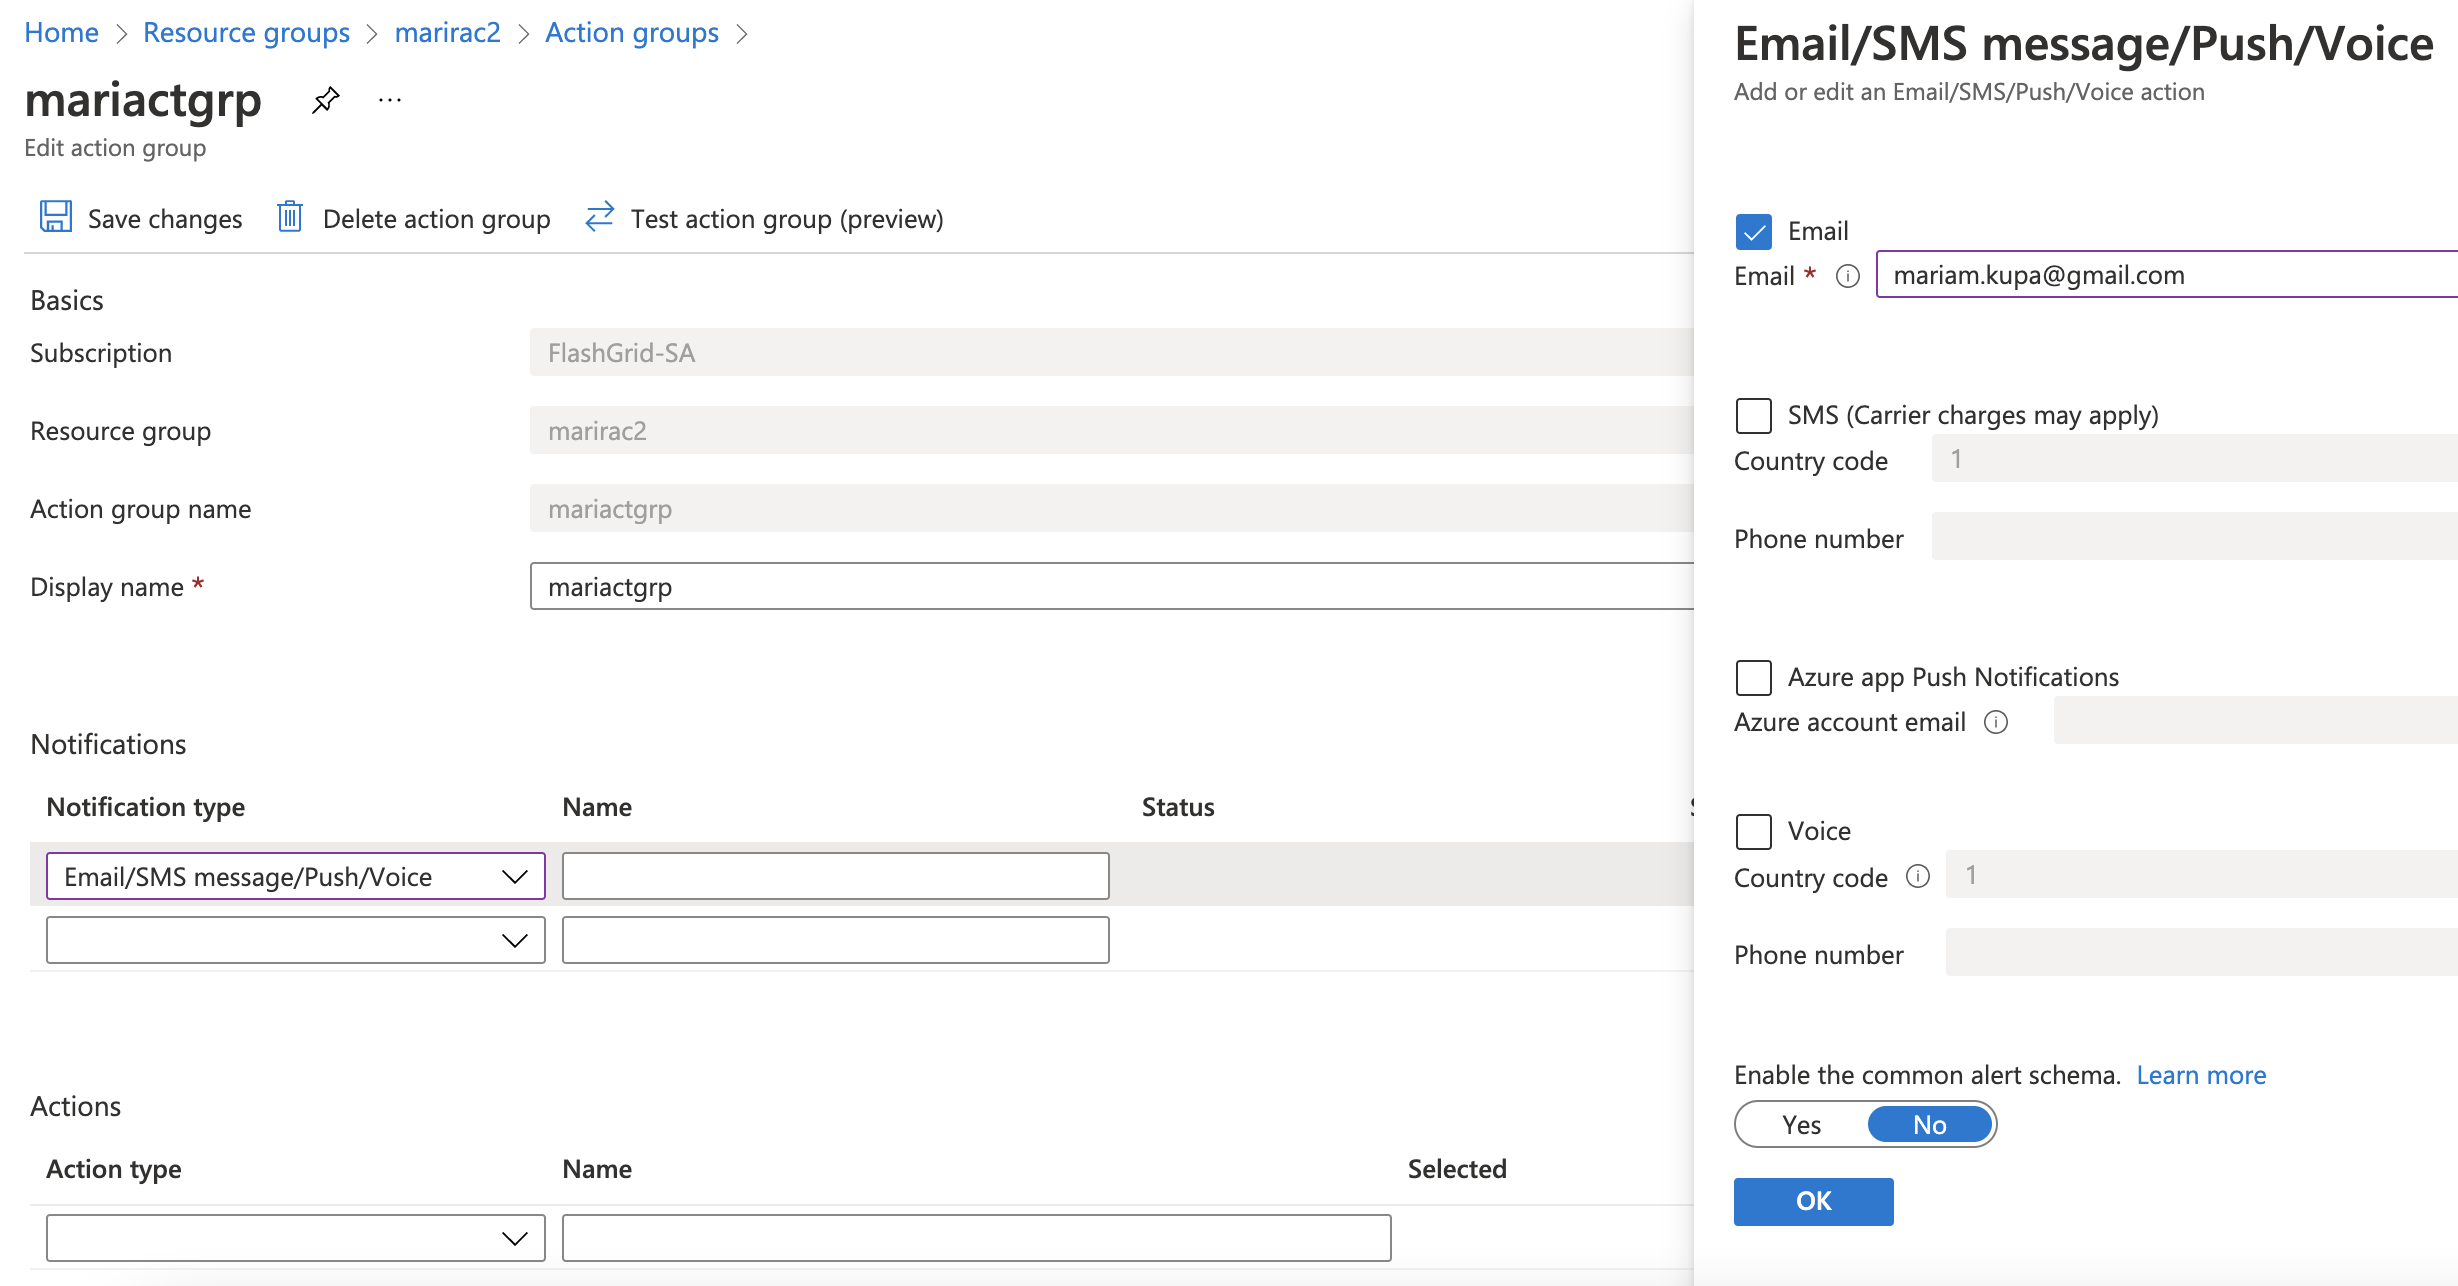
3. Go to the Resource Group (in my case marirac2) where you have created Action Group.
Resource groups -> marirac2 -> from the left-side panel choose Alerts -> Action groups -> choose action group name in my case mariactgrp -> on the Notifications section choose Email/SMS message/Push/Voice -> on the right-side panel click Email checkbox -> enter email address who will be responsible for receiving and handling these alerts -> click OK -> enter desirable name under Notifications section -> click Save changes.
4. Test alert by stopping and starting the VM (assuming it is a test environment)
After changing the state of the VM you will receive the following notification.
Please note notification should have been sent as soon as VM changes the state but email can come 2 – 3 min later.
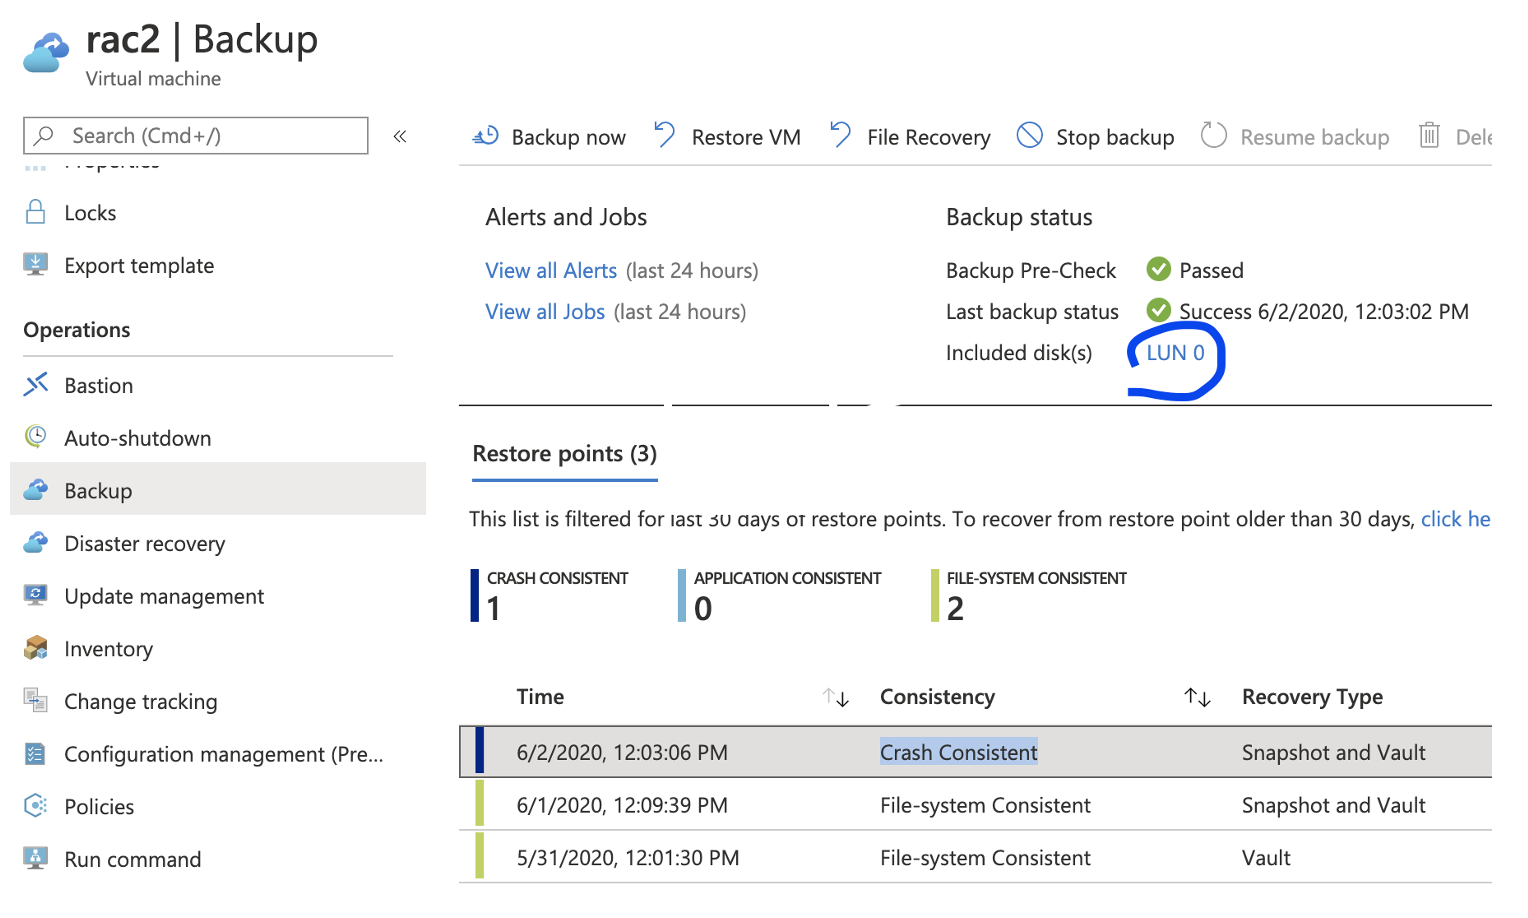
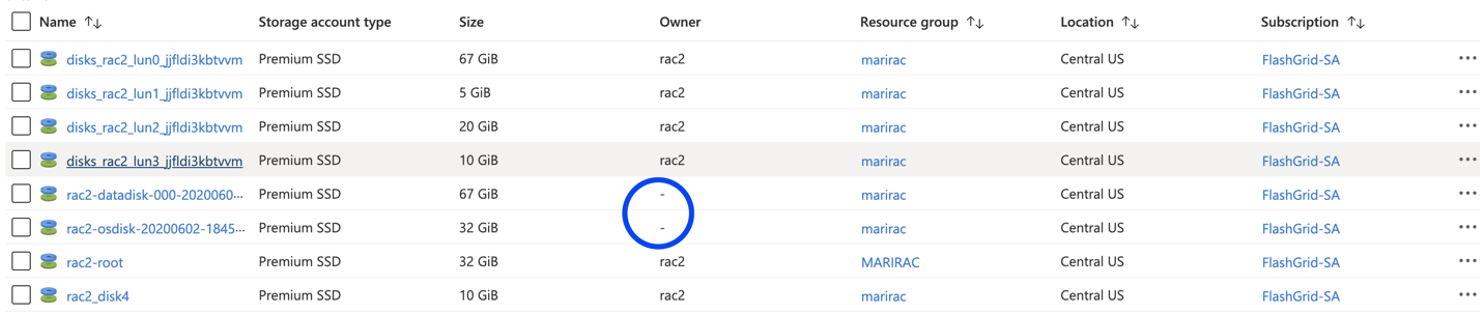
The above script restores them as managed disks, that are not attached to anything. Note restore did not replace the disk, it just restores as a new disk.
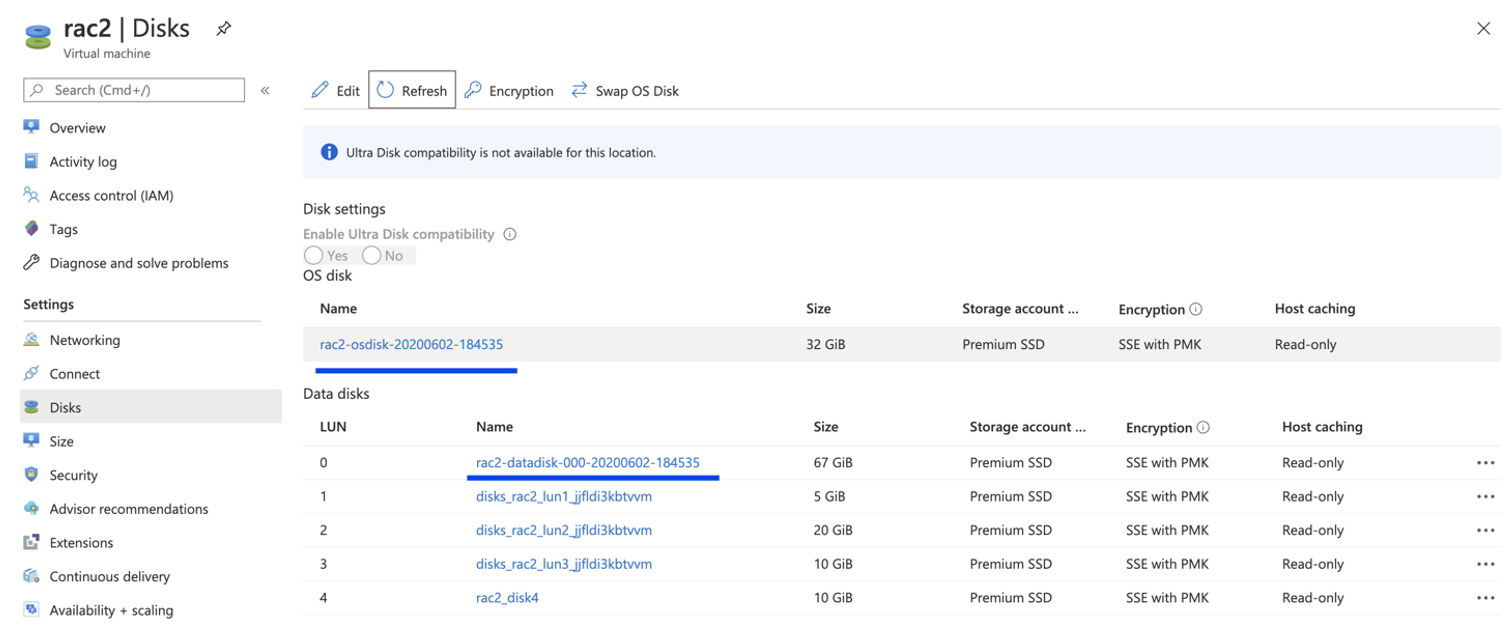
3. To replace disks do the following:
Detach old LUN0 -> Save -> Attach restored disk as Lun 0.
To replace existing OS disk with restored one, click Switch OS disk and then start the VM.
4. Check that files are not there anymore:
[root@rac2 ~]# ll /mari_root ls: cannot access /mari_root: No such file or directory
[root@rac2 ~]# ll /u01/mariu01 ls: cannot access /u01/mariu01: No such file or directory
1. If the node is a database node, stop all local database instances running on the node.
2. Stop database VM from Azure console. In azure you are not able to resize disks while VM is running, so we need to stop it first.
3. Increase all database disks belonging to the same diskgroup to the desired size. Make sure disks in the same diskgroup have the same sizes.
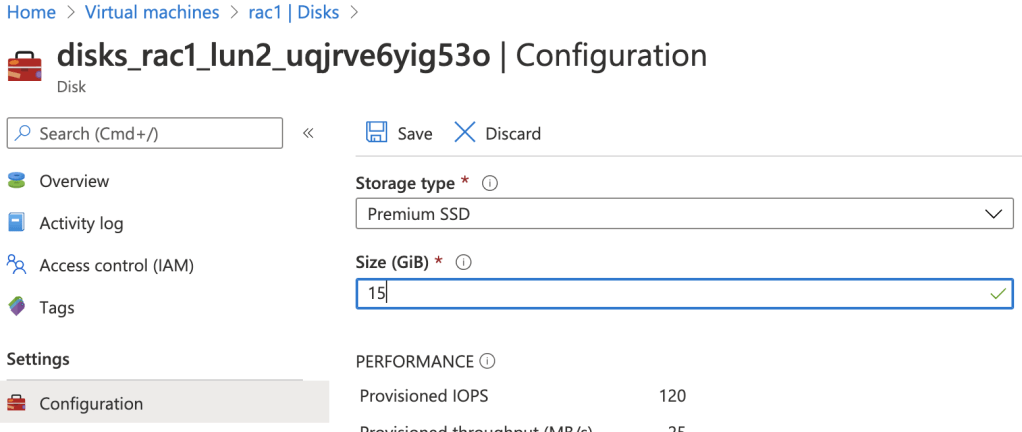
To resize disk, click VM -> Disks -> choose data disk (in my case 10GB disk is a DATA disk)
After clicking the above disk, you will be redirected to the following screen, choose Configuration -> enter desired disk size (in my case I’ve changed from 10 to 15) -> Save
4. Start the database node.
5. Repeat 1-4 steps for the next database nodes (no need to increase disks for quorum, it is only necessary for the database nodes)
6. Check new disk sizes:
If it is Fg cluster, Phys_GiB column must show increased size:
As MS team mentions migrating third party image based VMs between subscriptions is not possible.
When I try to migrate resources I get the following Error:
{"code":"ResourceMoveFailed","message":"Resource move is not supported for resources that have plan with different subscriptions. Resources are 'Microsoft.Compute/virtualMachines/rac1,Microsoft.Compute/virtualMachines/rac2,Microsoft.Compute/virtualMachines/racq' and correlation id is '14c65b8d-9ca5-4305-98fa-ce9b2d7e82b1'."}
As MS support team mentions we need to move resources using storage account and then create all of them manually in a new subscription. Which is very complicated. I found the following workaround.
Workaround
During migration, I found that the problem existed on VM and PIP resources only, while NSG, VNet, Disks did not have any issue (but they cannot be migrated if dependent resources exist, such as VM) .
HARBOR: Please do not consider this workaround for production systems. Contact MS support, if you encouter the same and get the recommendation from them.
I decided to save VM characteristics and deleted VMs from the old subscription. Don’t worry, data will not be lost, your disks are not deleted and you can create VM using OS disk and then attach additional disks. Save: > disk lun # and attached disk names > VM size > attached NICs > Publisher, Product, and Name for the image: Click VM link -> Export template (on the left side panel) -> find storage profile section inside template script.
I deleted PIP because it cannot be moved (we will recreate it in new subscription). If you don’t have PIP, then ignore. These are test servers so using PIP.
Migrate resources NSG, VNet, Disks, Nics, … using the following way:
2. Choose destination Subscription, Resource group, .. click OK
3. When the migration finishes, go to the destination subscription and using powershell run the following commands:
#######For rac1########Define variables, use the same resource names that were migrated
$pipname = "rac1-pip"
$nicname = "rac1-nic1"
$vnetName = "maritestan3-vnet"
$rg = "maritestan3"
$loc = "Central US"
#Create Public IP
$pip = New-AzureRmPublicIpAddress -Name $pipname -ResourceGroupName $rg -Location $loc -AllocationMethod Dynamic
$pip = Get-AzureRmPublicIpAddress -Name $pipname -ResourceGroupName $rg
#Identify VNet, subnet, nic names that were migrated. And assign PIP to nic
$vnet = get-AzureRmVirtualNetwork -Name $vnetName -ResourceGroupName $rg
$subnet = Get-AzVirtualNetworkSubnetConfig -Name "default" -VirtualNetwork $vnet
$nic = get-AzureRmNetworkInterface -Name $nicname -ResourceGroupName $rg
$nic | Set-AzNetworkInterfaceIpConfig -Name ipconfig1 -PublicIPAddress $pip -Subnet $subnet
$nic | Set-AzNetworkInterface
#Define VM size and attach nic
$vm = New-AzureRmVMConfig -VMName "rac1" -VMSize "Standard_D8s_v3"
$vm = Add-AzureRmVMNetworkInterface -VM $vm -Id $nic.Id
#Define your plan, for this you will need Publisher, Product and Name saved from old subscription
Set-AzureRmVMPlan -VM $vm -Publisher "flashgrid-inc" -Product "flashgrid-skycluster" -Name "skycluster-ol-priv-byol"
Get-AzureRmMarketPlaceTerms -Publisher "flashgrid-inc" -Product "flashgrid-skycluster" -Name "skycluster-ol-priv-byol" | Set-AzureRmMarketPlaceTerms -Accept
#Provide the name of the OS disk from where VM will be created
$osDiskName = "rac1-root"
$disk = Get-AzureRmDisk -DiskName $osDiskName -ResourceGroupName $rg
$vm = Set-AzVMOSDisk -VM $vm -ManagedDiskId $disk.Id -CreateOption Attach -Linux
#Create new VM
New-AzureRmVM -ResourceGroupName $rg -Location $loc -VM $vm
I am repeating the same steps for other VMs.
#######For rac2#######
#Define variables, use the same resource names that were migrated
$pipname = "rac2-pip"
$nicname = "rac2-nic1"
$vnetName = "maritestan3-vnet"
$rg = "maritestan3"
$loc = "Central US"

#Create Public IP
$pip = New-AzureRmPublicIpAddress -Name $pipname -ResourceGroupName $rg -Location $loc -AllocationMethod Dynamic
$pip = Get-AzureRmPublicIpAddress -Name $pipname -ResourceGroupName $rg

#Identify VNet, subnet, nic names that were migrated. And assign PIP to nic
$vnet = get-AzureRmVirtualNetwork -Name $vnetName -ResourceGroupName $rg
$subnet = Get-AzVirtualNetworkSubnetConfig -Name "default" -VirtualNetwork $vnet
$nic = get-AzureRmNetworkInterface -Name $nicname -ResourceGroupName $rg
$nic | Set-AzNetworkInterfaceIpConfig -Name ipconfig1 -PublicIPAddress $pip -Subnet $subnet
$nic | Set-AzNetworkInterface

#Define VM size and attach nic
$vm = New-AzureRmVMConfig -VMName "rac2" -VMSize "Standard_D8s_v3"
$vm = Add-AzureRmVMNetworkInterface -VM $vm -Id $nic.Id

#Define your plan, for this you will need Publisher, Product and Name
Set-AzureRmVMPlan -VM $vm -Publisher "flashgrid-inc" -Product "flashgrid-skycluster" -Name "skycluster-ol-priv-byol"
Get-AzureRmMarketPlaceTerms -Publisher "flashgrid-inc" -Product "flashgrid-skycluster" -Name "skycluster-ol-priv-byol" | Set-AzureRmMarketPlaceTerms -Accept

#Provide the name of the OS disk from where VM will be created
$osDiskName = "rac2-root"
$disk = Get-AzureRmDisk -DiskName $osDiskName -ResourceGroupName $rg
$vm = Set-AzVMOSDisk -VM $vm -ManagedDiskId $disk.Id -CreateOption Attach -Linux

#Create new VM
New-AzureRmVM -ResourceGroupName $rg -Location $loc -VM $vm
#######For racq########Define variables, use the same resource names that were migrated
$pipname = "racq-pip"
$nicname = "racq-nic1"
$vnetName = "maritestan3-vnet"
$rg = "maritestan3"
$loc = "Central US"
#Create Public IP
$pip = New-AzureRmPublicIpAddress -Name $pipname -ResourceGroupName $rg -Location $loc -AllocationMethod Dynamic
$pip = Get-AzureRmPublicIpAddress -Name $pipname -ResourceGroupName $rg
#Identify VNet, subnet, nic names that were migrated. And assign PIP to nic
$vnet = get-AzureRmVirtualNetwork -Name $vnetName -ResourceGroupName $rg
$subnet = Get-AzVirtualNetworkSubnetConfig -Name "default" -VirtualNetwork $vnet
$nic = get-AzureRmNetworkInterface -Name $nicname -ResourceGroupName $rg
$nic | Set-AzNetworkInterfaceIpConfig -Name ipconfig1 -PublicIPAddress $pip -Subnet $subnet
$nic | Set-AzNetworkInterface
#Define VM size and attach nic
$vm = New-AzureRmVMConfig -VMName "racq" -VMSize "Standard_D8s_v3"
$vm = Add-AzureRmVMNetworkInterface -VM $vm -Id $nic.Id
#Define your plan, for this you will need Publisher, Product and Name
Set-AzureRmVMPlan -VM $vm -Publisher "flashgrid-inc" -Product "flashgrid-skycluster" -Name "skycluster-ol-priv-byol"
Get-AzureRmMarketPlaceTerms -Publisher "flashgrid-inc" -Product "flashgrid-skycluster" -Name "skycluster-ol-priv-byol" | Set-AzureRmMarketPlaceTerms -Accept
#Provide the name of the OS disk from where VM will be created
$osDiskName = "racq-root"
$disk = Get-AzureRmDisk -DiskName $osDiskName -ResourceGroupName $rg
$vm = Set-AzVMOSDisk -VM $vm -ManagedDiskId $disk.Id -CreateOption Attach -Linux
#Create new VM
New-AzureRmVM -ResourceGroupName $rg -Location $loc -VM $vm